Bandism

wrap art

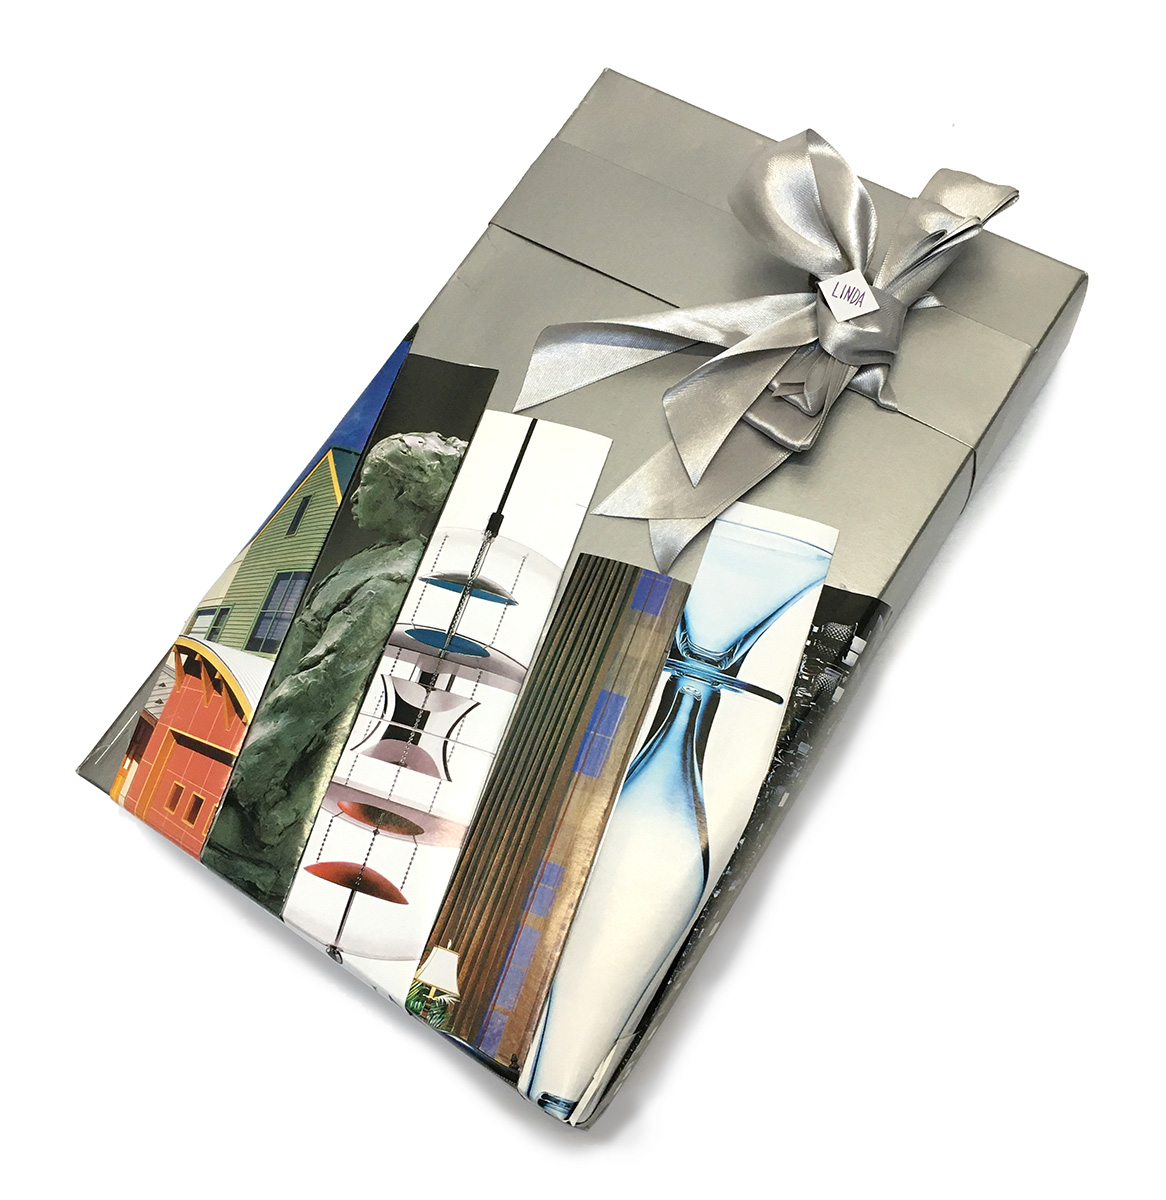
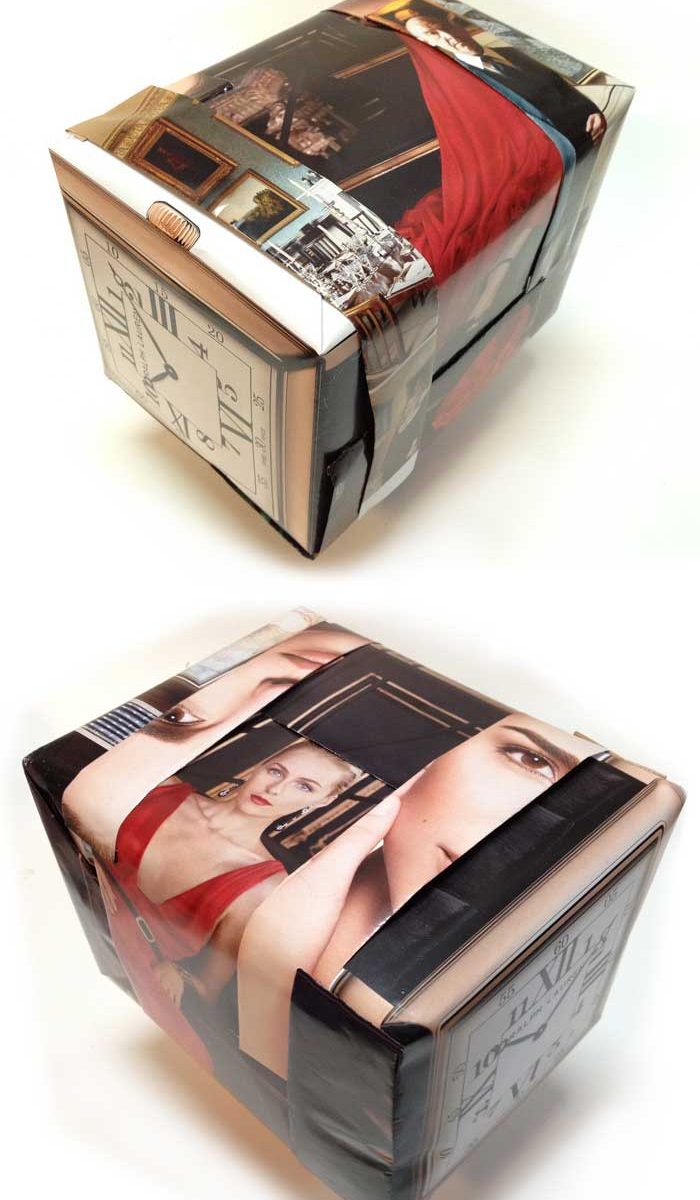
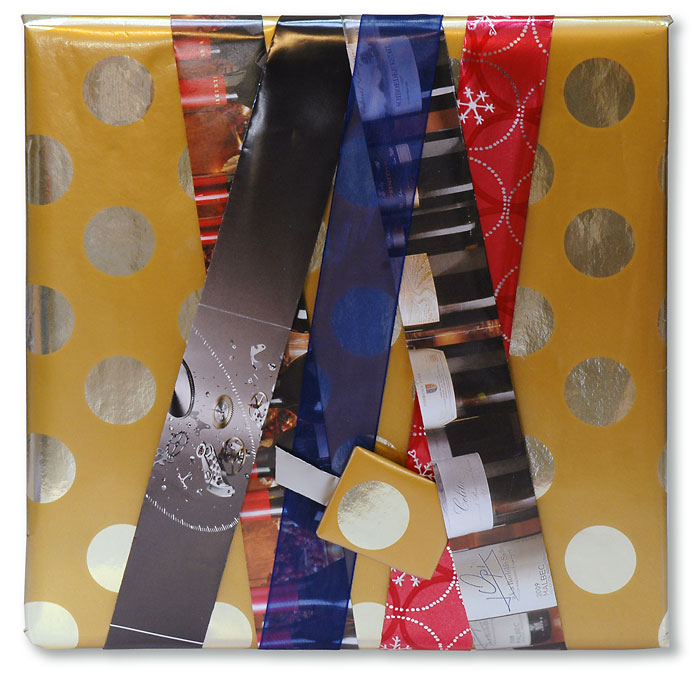
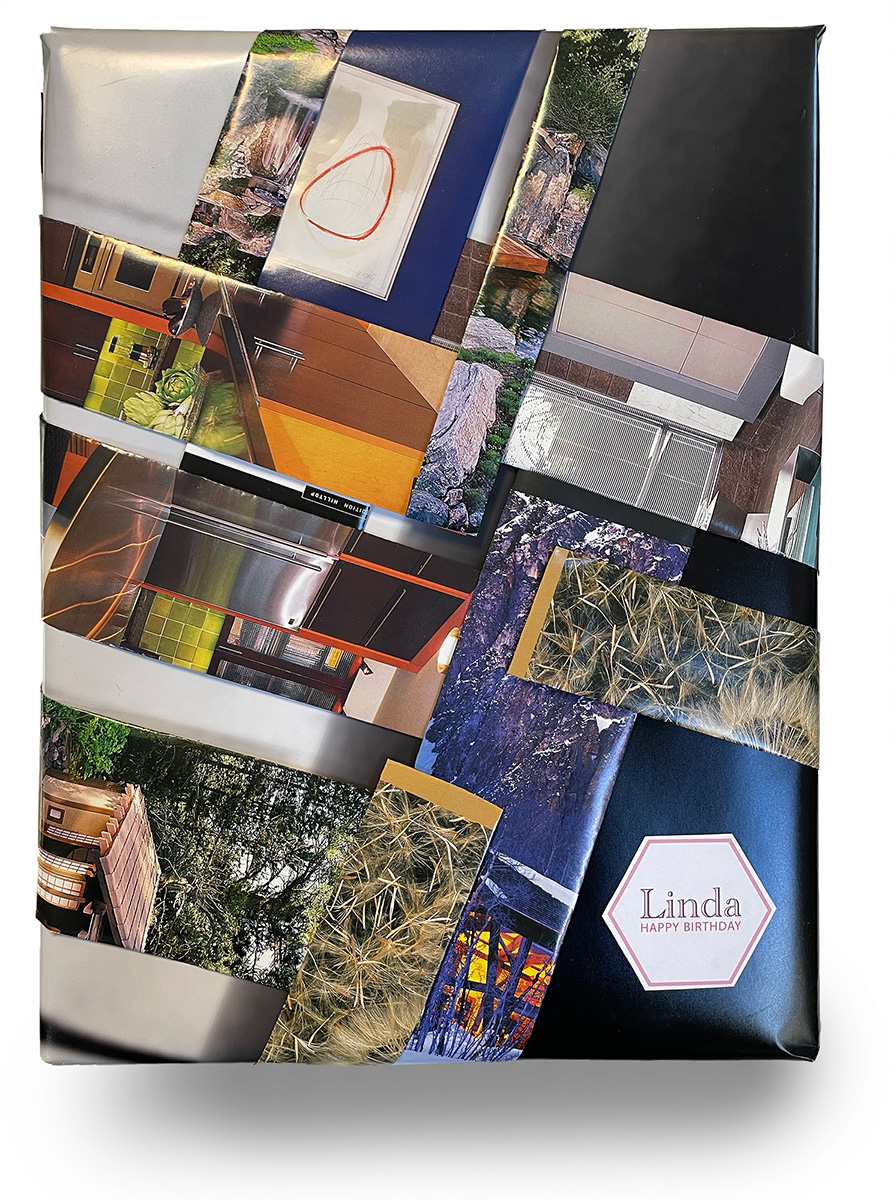
I began with a large piece of paper, a black and white proof for a large digital painting. I could cover the entire box. The box was fairly large. That also meant that wrapping bands made from magazine pages would not wrap all the way around from the back of the wrap, across the face of the package and then returning to the back. They would barely make it from the side and across the face.

So I folded the ends creating the puffy quality that characterizes the edges of wrapping bands. Then it was a matter of slicing the magazine pages, folding those pieces, gluing the ends, gluing the side and slapping them onto the wrap. I do stop and study between the application of each band. I added a few special pieces on the sides and ends, to give some extra finality and finish to the collage. The wrap had impact!

Restoration Band Wrap

I had a silver box with a silver bow. It fit the gift. But it had been stepped on while in storage. I decided the make a partial band-wrap to cover up the creases and wrinkles that were visible on one end of the box. First I did some rehab, gluing two panels of corrugated board onto the inside of the box, flattening the crushed panels of the box.

For bands wraps, I like to use the pages of fancy magazines. I cut the pages into strips, and fold over both long edges. I do a little compositional testing with the strips to see what works. This is the first time I have left a major portion of the box exposed, the bands extending on partially across the box. Once I felt confident in my design, I glued on the bands, making sure I had enough on each band to wrap right on down the short sides of the box.

The box remained ready to open. I added the gift. The bow is attached to a cardboard band that came with the box. I slipped it back on and added a tiny square recipient label.

Magazine Wrap

This wrap did not even have a box. I put a gift of notecards between two pieces of corrugated board. Two pieces of tape made them a unit. Then I picked up a magazine that had lots of ads with large photos with tasty textures. I placed the first piece at an angle and proceeded to wrap it, folding the ends and gluing the foldovers onto the back. I then selected another page from the magazine. I positioned it in various ways until I knew what I wanted. I folded the two edges that would be visible on the front of the wrap, and then began gluing the piece into place. Next I took a strip with imagery of marble and folded its edges, making a traditional wrapping band. I positioned it and glued one end. Snugged the other end tight and glued it. I then took, from a jar of alphabet beads, the initials “N” and “S” of the recipient’s name. I glued them on, using a nail to hold the hot glue, and place it on the wrap. I then added the two beads. It is a moody wrap, with a rich materiality conveyed by the continuous tones of the photographs.

Speedy Band Wrap

This wrap came together fast, before heading out to a Memorial Day gathering. It covers a thin envelope containing note cards. No box.

The concept was contrast: contrasting patterns, foil/flat contrast. I used band ribbons made with the silver foil paper.

The layout is traditional ribbon cross. To liven it up I made and angled name tag, double-taped into place. The patterned paper is a small fragment left over from a small shopping bag. The dark blue is a fragment from a kit of Coloraid paper I bought many decades ago and only recently discovered.

This wrap also follows my wrap-art mandate for no-fuss construction; the backside is not elegant.

Florist-paper Wrap

floral paper wrap

When you buy cut flowers they come wrapped in durable, handsome paper. And the sheet is large enough to do some serious wrapping. This particular sheet appeared to be a form of plastic. It folded and creased in a pleasing fashion. After wrapping the gift I resorted to speedy and reliable ribbon-wrap tactics. First I made a yellow band of tissue paper, gluing it on the back. I then added two strips of a thin, shiny red ribbon to back a border stripe on the yellow band. The little red square is made of craft foam, placed at a 45 degree angle. I then completed the wrap with the transparent-weave blue ribbon (which had been cast off at an awards dinner by the medal winners, and retrieved, rolled up and removed for recycling by yours truly) running transverse to the band. I made this wrap quickly: no time for innovation. A house to be warmed; a dinner to be enjoyed.

45-degree Wrap

Foil paper is a joy to wrap. It folds so effortlessly. I made four panels using two kinds of holiday paper, one a light gold with words, and the other a darker red with snow flakes: contrast of color, plus contrast of symbols (image vs. alphanumeric). I wrapped under the edges of the paper, creating puffy effects similar to the wrapping bands I often use.

Before applying the panels, I made a small golden square by cutting a piece of foam and gluing on a strip of ribbon. I placed this in the center of the gift box at a 45 degree angle. This is the seed crystal of the wrap.

Next I began hot-gluing on the four panels. Once again, I ignore what happens on the backside; I just get the back wraps flat, however messy.

Then I chose two kinds of ribbon: silver to go on the red, and red to go on the gold. I glued them by their ends. They are positioned one unit (defined by the central square’s widh) away from the central square.

This is not the easiest or quickest wrap. It does allow you maximize favorites scraps you have saved. And the ribbon technique could be used to expand the design even further than I have gone here.

Cross Band Wrap in Recycled Florist’s Papers

All three papers in this wrap came from the purchase of cut flowers. The yellow and green material is some kind of thin felted fiber.

After wrapping the box with the white and purple vine paper, I began folding the yellow paper over onto itself, making it into a ribbon-like wrapping band. The paper had slices and tears in it from the way the florists cut it to embrace the cut flowers. So I had to use little pieces of transparent tape to stabilize it during folding.

The green paper is actually two fragments joined by tape. The tape join was hidden by sliding the green band under the yellow.

I chose the offset positioning of the bands to add a dash of asymmetry to what is ultimately a very traditional wrap. And then I made a quick drawing of the recipient’s initials; I cut that design out of black paper. I fastened it with rolled tape to the yellow band, positioning it uphill from the bands’  intersection.

This wrap represents the enrollment of typical throw-away materials into an easy interpretation of traditional wrapping.

Elegant Band Wrap on a Beefy Box

Many of my band wraps have been composed loosely, with an emphasis on layered diagonals. I wanted to try out a more strict composition, relying on the traditional 90-degree composition of ribbon wrapping.

I chose to do this on a very well-made dark blue box from a notable fashion company. Because the box was made of thick cardboard, I saw the opportunity to apply my bands only on the lid, allowing the collage to stay intact even as the recipient opened the box.

I made a variety of bands by cutting up magazines into strips and folding their edges. I applied only three, choosing them for their chiaroscuro qualities. After I had glued on the three bands, I realized I should have applied a horizontal band, in the style of ribbon wrapping. I slipped gold ribbon under the three bands and glue it in place. I placed the gift in the box after wrapping.

Cube-Box Band Wrap

Many of my band wraps have been on flat boxes or envelopes. I decided to try a variation on a small cube-shaped box.

I used pages from a magazine. And instead of working with thin bands exclusively, I began wrapping with two whole pages.

I laid the box on top of one page, folding one end and then the other just as you would fold the ends of a normal, one-piece wrap. Of course, there are only three flaps in this kind of end fold, not the usual four.

When you are done, the box will now have an empty, wrapless area all around the middle of the box. To cover that naked area, I cut one magazine page in half and made two wide bands. I folded their edges, creating the typical slightly-puffy edge of the wrapper’s band. I glued them in place.

Now the wrap was completely covered. The base was ready. I could begin the fun part of making the collage of layered imagery. I made a series of thin bands and layered them along the edges of the first, wide band. In no time I had an intriguing and engaging wrap.

Band Wrap on Gold-Dot Paper

I’m still working on posts of this past christmas’ wraps. I did lots of band wraps because of their speed and verve. This polka-dot foil paper came from a calendar’s wrap.

The bands include three from magazines, one from red holiday wrap, and one that is blue gauze ribbon. A small label tag was made of the yellow foil paper.