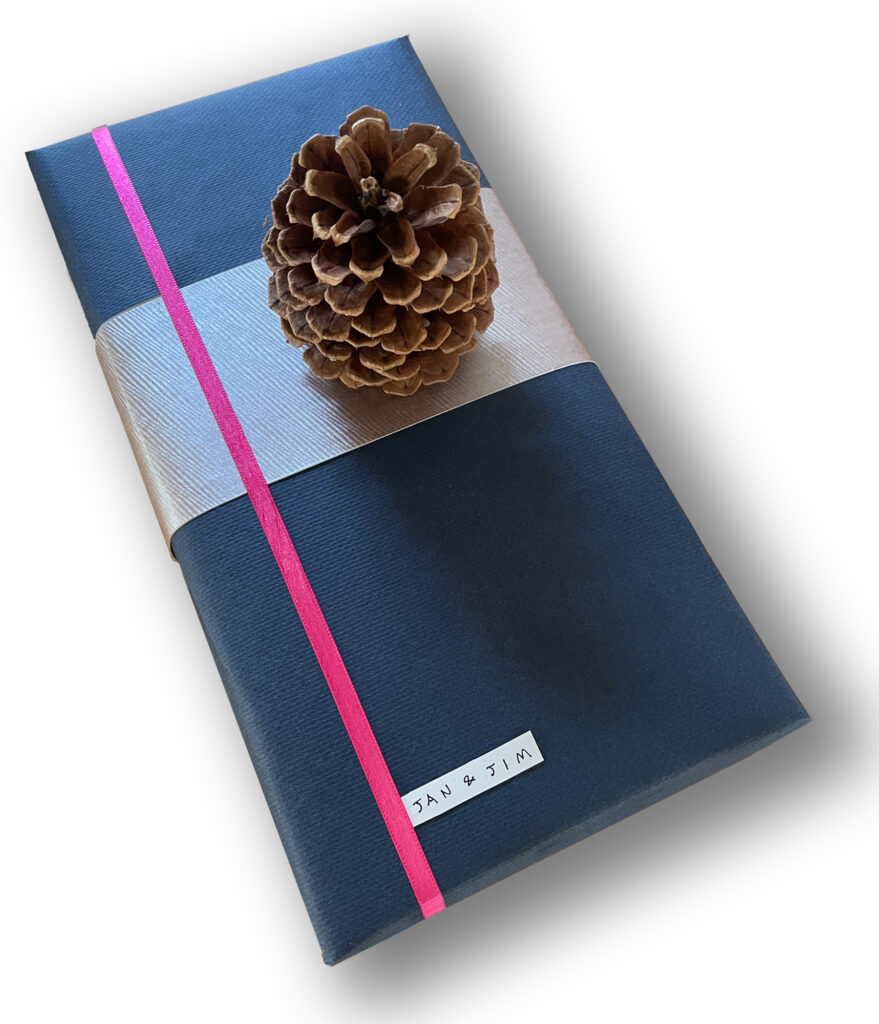
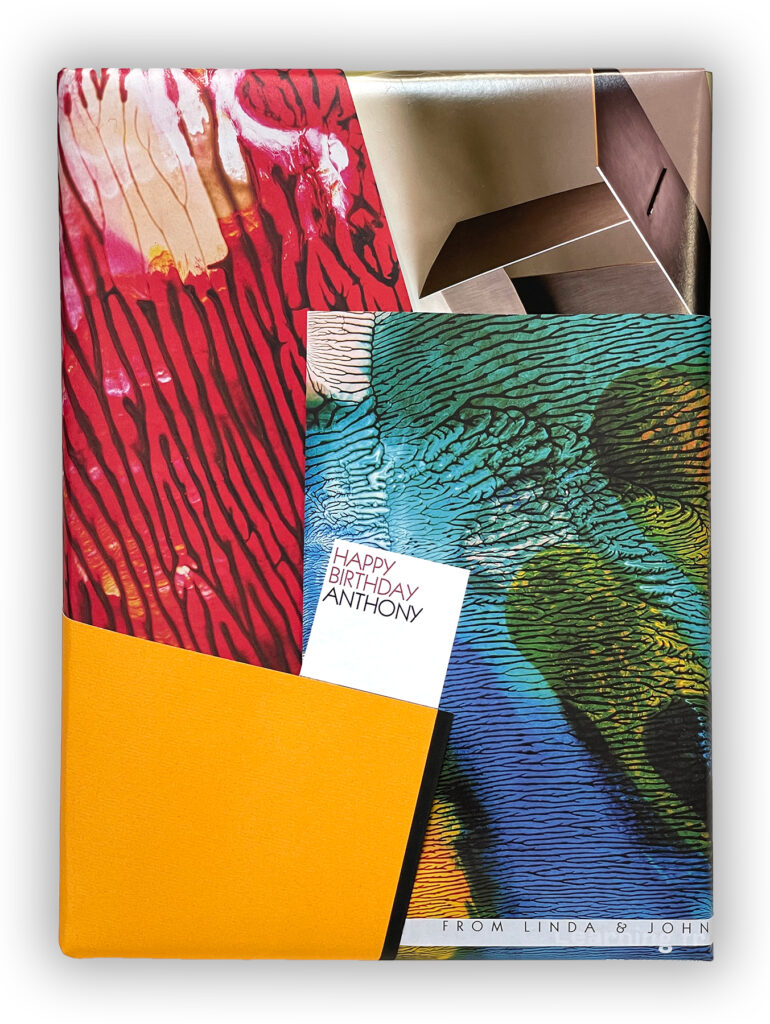
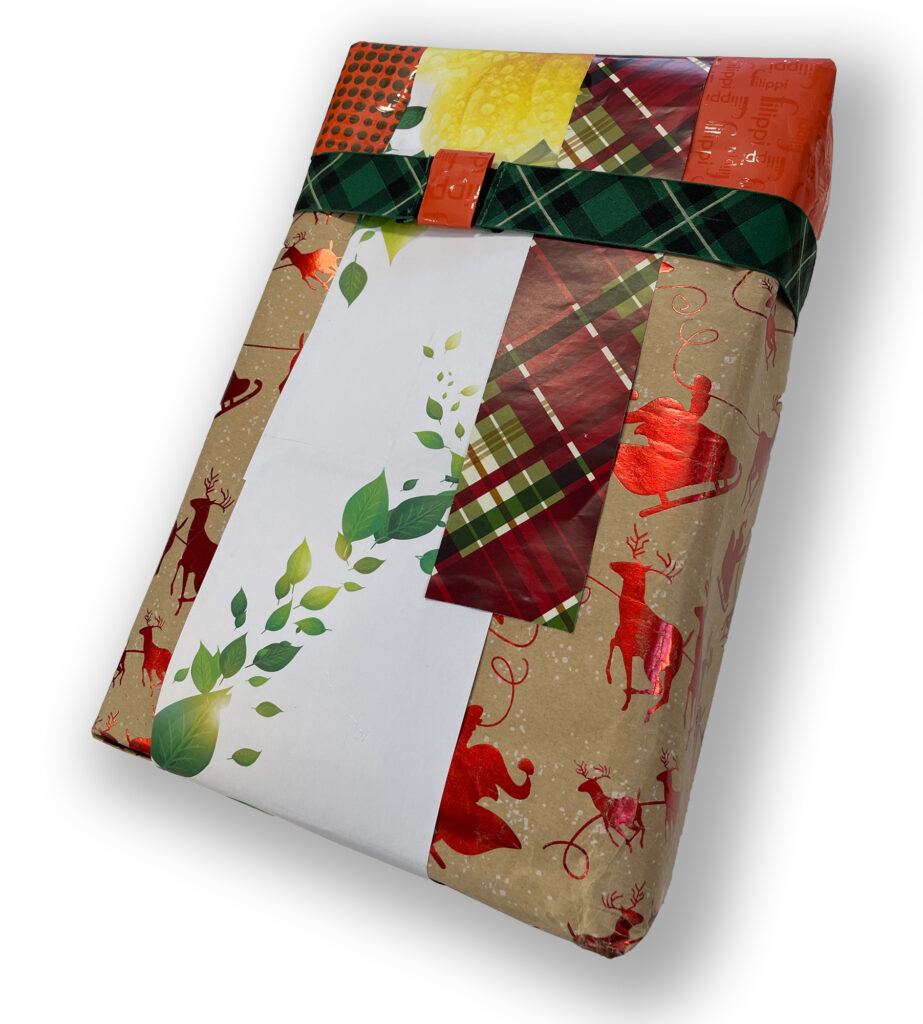
Bionic Collage

wrap art anthony

I had clipped some pages from issue 170 of the Yale Medicine Magazine recently, pages with lovely images that appeared to made by layering paints or inks and then laying other papers on top of that color and then lifting them up to create complex, organic-looking patterns. The results were great. After underwrapping the box I added the red page to the upper left corner, wrapping it around the corner. Then I added a photo from a design magazine in the upper right corner. Next I applied the green/blue page and wrapped it around the lower right corner. I added the yellow corner, the cover of a brochure I had designed for a client many years ago. It came with a thick black stripe. I made the gift label in Illustrator, cut it and glued it onto the wrap, aligning its right edge with the left edge of the black stripe.

Triangles

This is an example of accretive wrapping. It starts with a “base coat” of plain paper, applied in the traditional way: a single piece of paper wrapped, with two folded ends.. The first layer of accretion consists of six separates rectangles of imagery taken from magazines and marketing literature.. I cut them out to fit the six sides of the gift box, gluing or double-taping them onto the base wrap. Then I cut and fitted six triangles of stiff paper from printer’s paper samples. These are all glued on the image layer. The wrap can rest on any of the six sides. All views of this wrap are good.

2square Mag Collage

I decided it would be quicker to pack this gift between two squares of corrugated cardboard, than to cut out a custom box. My plan uses corks as pillars to create the space for the gift after creating the two square collages. I covered the two squares with paper from a large design magazine whose ads and special features provided a variety of engaging textures. I used my hot glue sparingly and assembled the collages speedily, wrapping the around the edges of the squares.

I used seven corks to separate the squares. Where the eighth cork would have gone along the middle of one side, I left open space, to ease the retrieval of the gift. To keep the gift from rattling around inside and ripping open the paper walls I planned to glue around the edges of the wrap, I hung the gift inside using three lightly-glue corks, placed strategically in the interior. Then I closed up the wrap with four pieces of cover stock pages, cut to the height of the corks. They are glued to the corner corks. One corner has a “pull open here” sticker placed to guide the recipient in un-wrapping.

It looks like a large picture book, except that there is no spine.