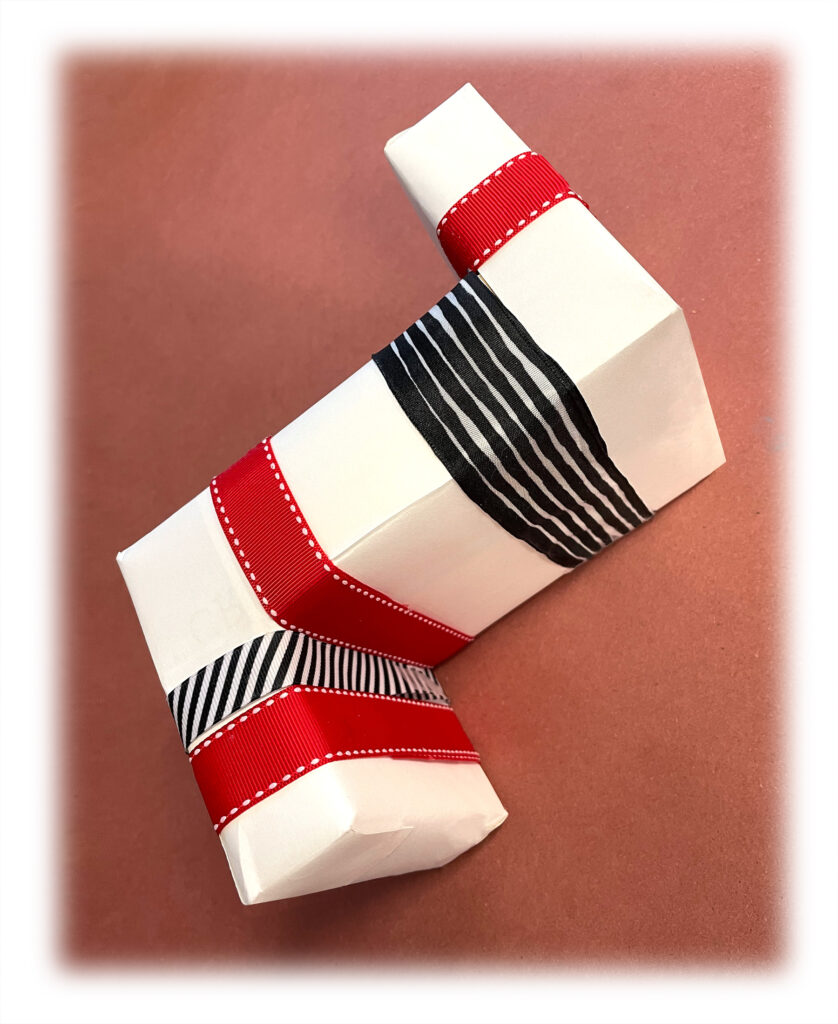
I have so many small boxes that I felt it would be a good idea to design wraps that used this surplus. The gift is in the largest box. It is wrapped with a page from a museum newsletter. The two added boxes are attached to the primary box. The littlest box, with a red foil surface and black angled stripes, serves two purposes. It is the name tag for the recipient. And it is a handle attached to the top white middle box. That white box has no wrap, and the offset of its lid is obvious. When you grab the black striped “handle” the white lid lifts off, revealing a curled white strip inside telling the recipient that the gift is inside the bg box. Silly, yes. But hopefully of some charm.
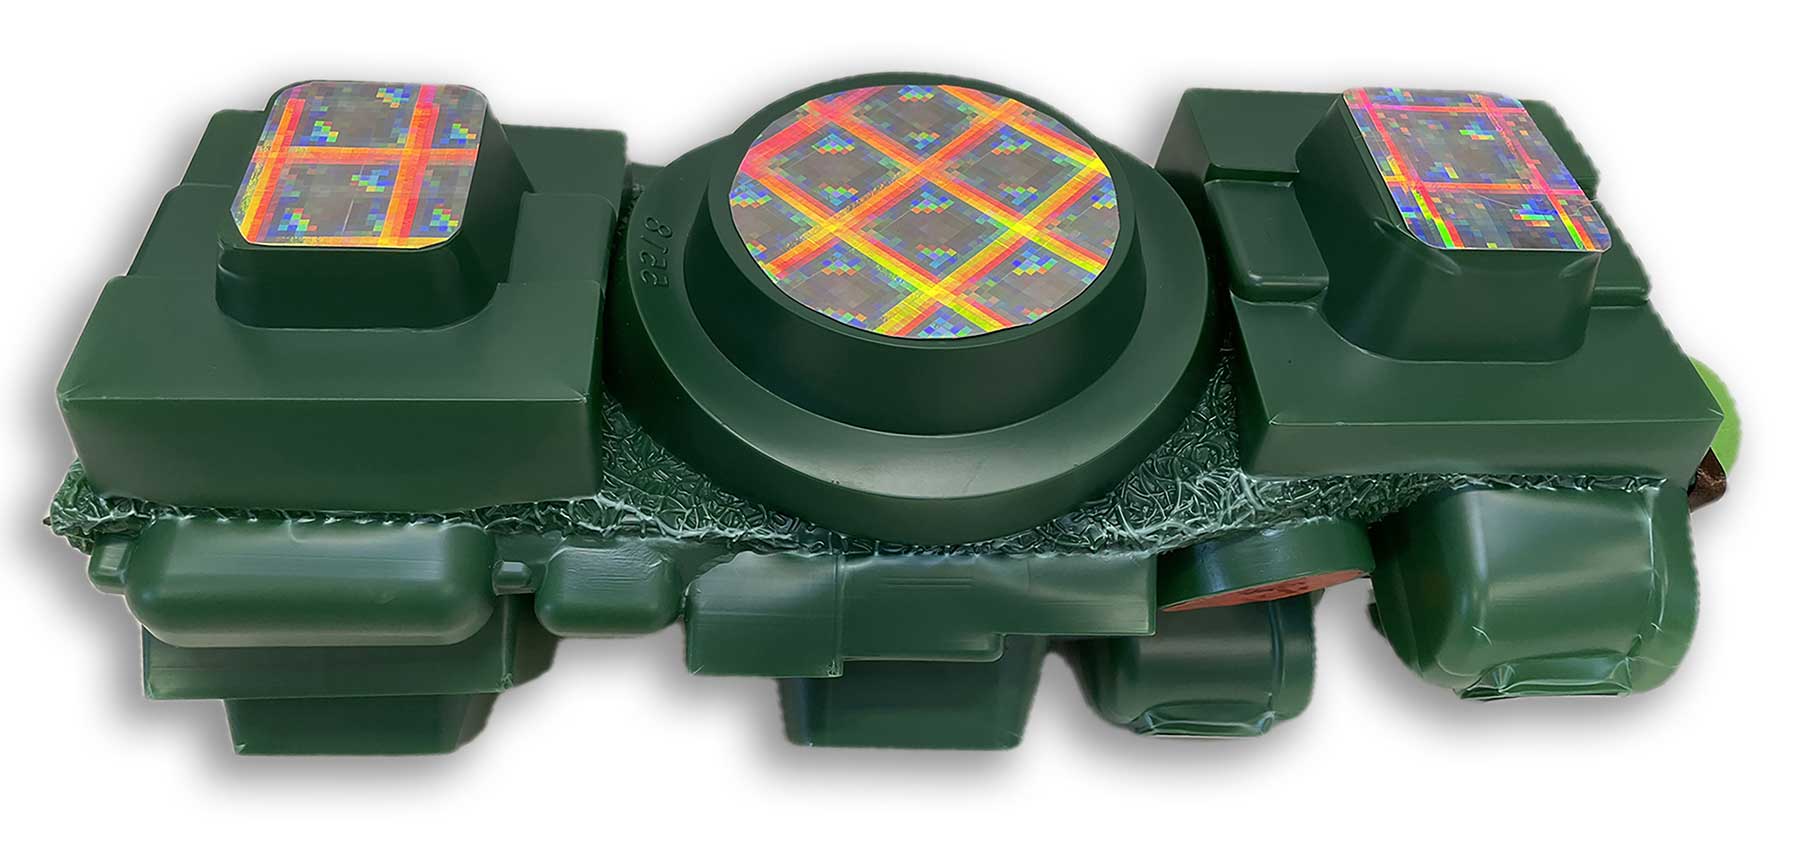
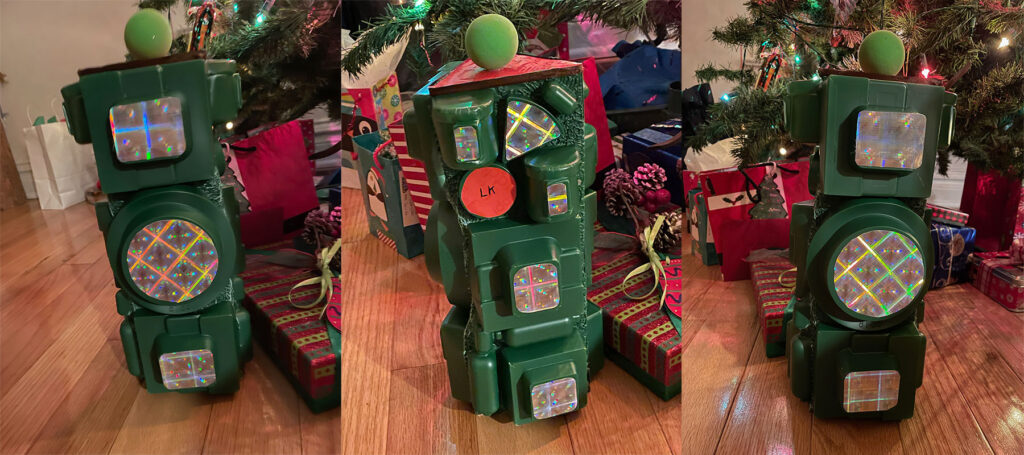
We had received a Christmas food gift from my brother & his wife. A green plastic tray held all the goodies in place in little pockets of vacuum molded soap. Playing with the intriguing topology of this object I discovered that it could be folded in thirds king a triangular column.
When I had the chance to turn into wrap art I tied it and hot-glued it closed, joining the outer edges of the three panels. I made triangular paper inserts out of stiff paper that fit into the top and bottom of the plastic box. I placed the gift inside and padded it with two foam scraps to preclude any motion motion of the gift.
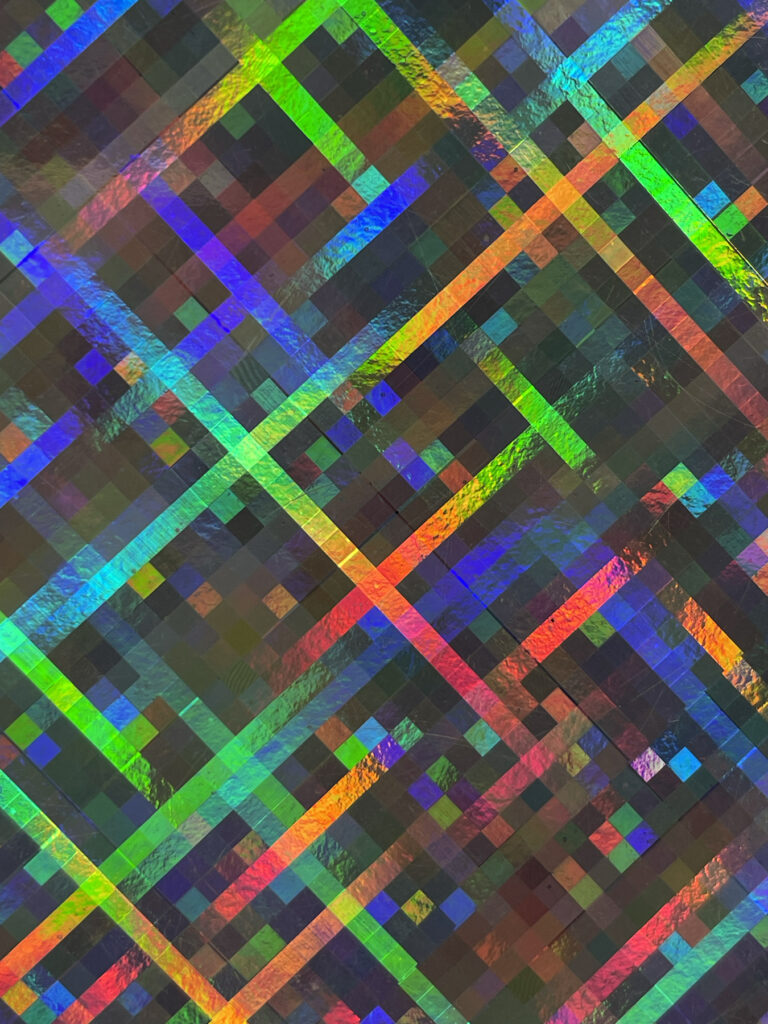
Now it was time to consider what to put on all the various flat platforms that arose from the three sides of the plastic form. I visited the ribbon closet and found a square cardboard envelope which had a holographic surface in a gridded pattern. When one views this materials from different angles, spectrum color shifts occur in the little squares of the paper’s pattern. There is almost constant animation. I began cutting squares, and triangles of this paper, fitting them on the various protrusions populating the green triangle-tube. Where cookies, chocolate, sausage, and cheese once lay in waiting, the container now popped out with these small dynamic color generators. To the eye they simulate little digital screens.
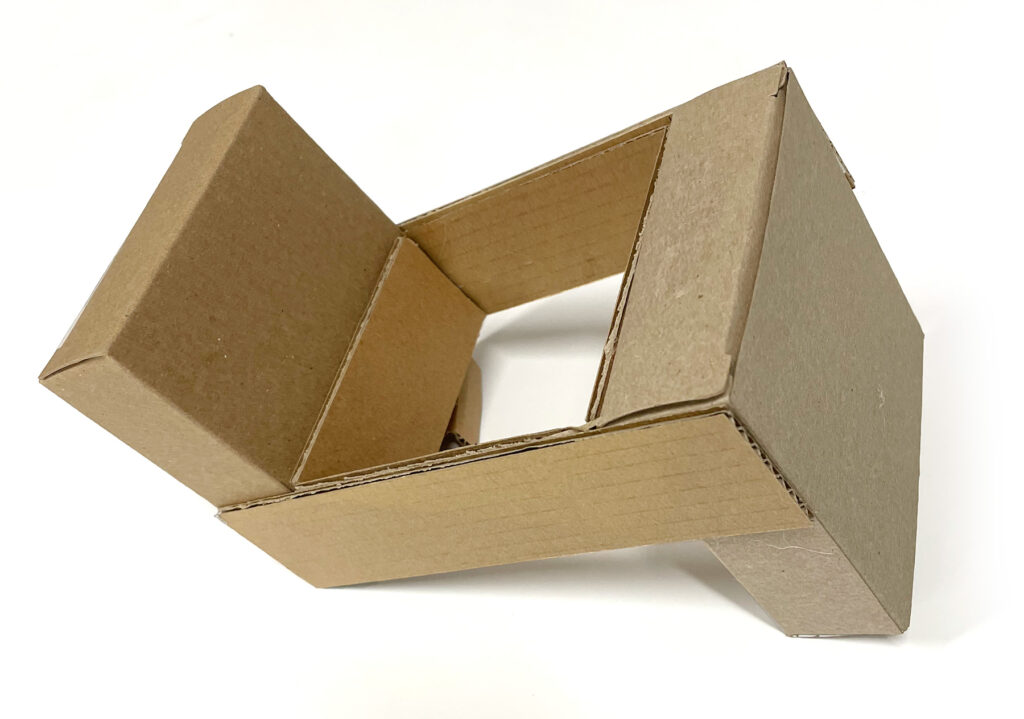
I had two small boxes, about the same size as the he gift I wanted to wrap. They suggested to me the idea of making an irregular shaped “giftbox.” I set about to make a special skeleton out of the two boxes, linking them with beams of corrugated board, The gift fits right inside the space between the two boxes and their beams.
Extra pieces of board made the gift fit snug in order to make the task of wrapping this odd shape a bit easier.. Admittedly the task of wrapping this conglomeration in white paper was not that easy. I knew that there was no easy way to wrap this zig zag box with a single piece of paper. So I collaged it with numerous pieces of scrap 8.5″X11″ stationery. I used both thin tape and a bit of hot glue. Finally I had a solid white wrapped zigzag. I added three red ribbons one kind of red ribbon, and two pieces, of varying pattern black and white ribbon. I made the label out of small gray and very flat beach beach pebble. I inscribed the name with a marker.
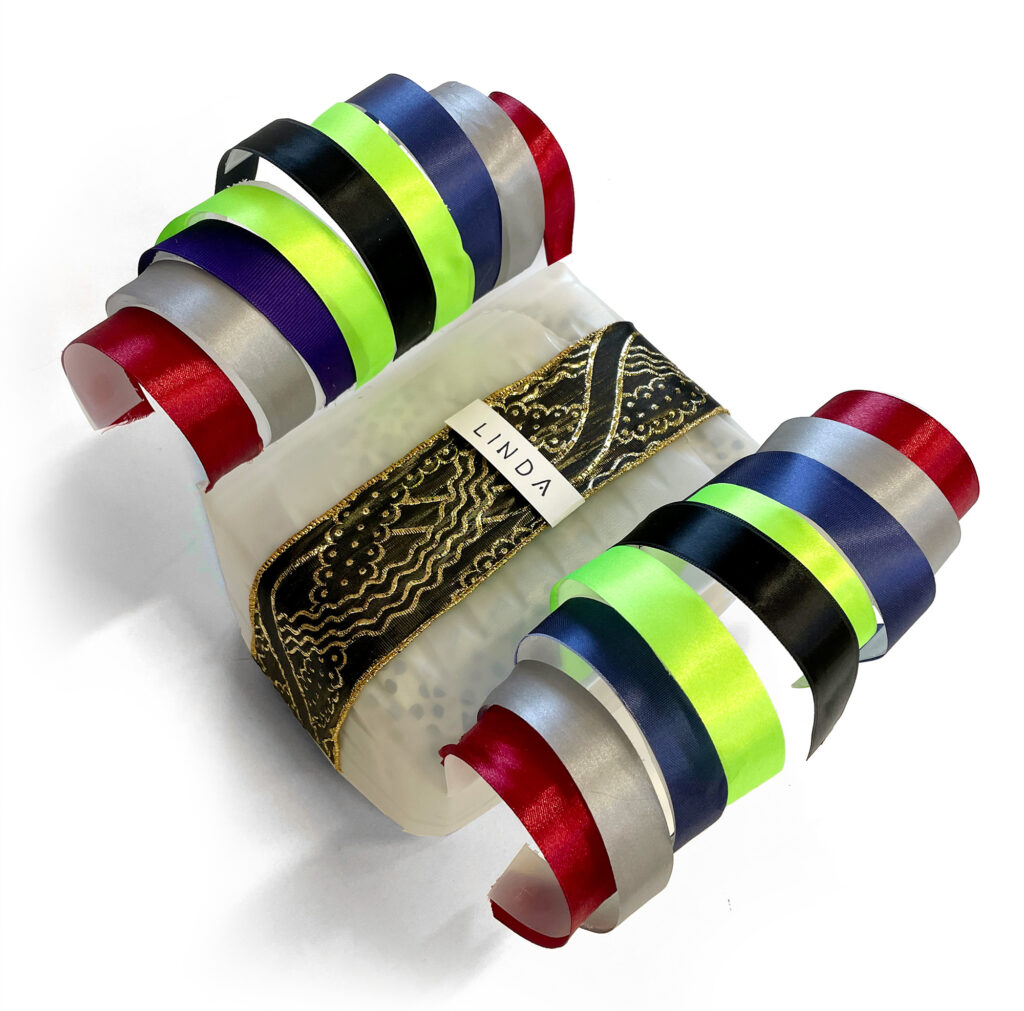
I began with an 8.5 lb. kitty litter jug and a desire to cut it into a gift box with projecting arms. I cut off the top. Then I cut down along the four vertical corners, stopping when I got to a point I considered the top of the gift box that I was building; that was about four inches from the bottom. At this point I had a gift box with two wide walls and two thinner walls. The walls rose straight up from the box and my next actions would make the walls along the long side into curved ribbon holders. First I need to create the closure of the gift box. I took the short-side walls and folded them down, forcing a soft crease where the wall joined the box. Then both walls could be folded down, one on top of the other. I cut a 1/4″-wide slit into the bottom wall. I cut an insert-tongue into the upper wall, and fit it into the crease.
Now I was ready to convert the two longer walls into the ribbon-holding art. Eight vertical cuts created nine strips. I rolled them up and the jug’s plastic had enough memory to hold some the forced curling. Using small squares of double tape I applied eighteen pieces of ribbon to the plastic arc. I finished with a textured gold and black ribbon, and a name tag, which has two fold to attach it to the ribbon.
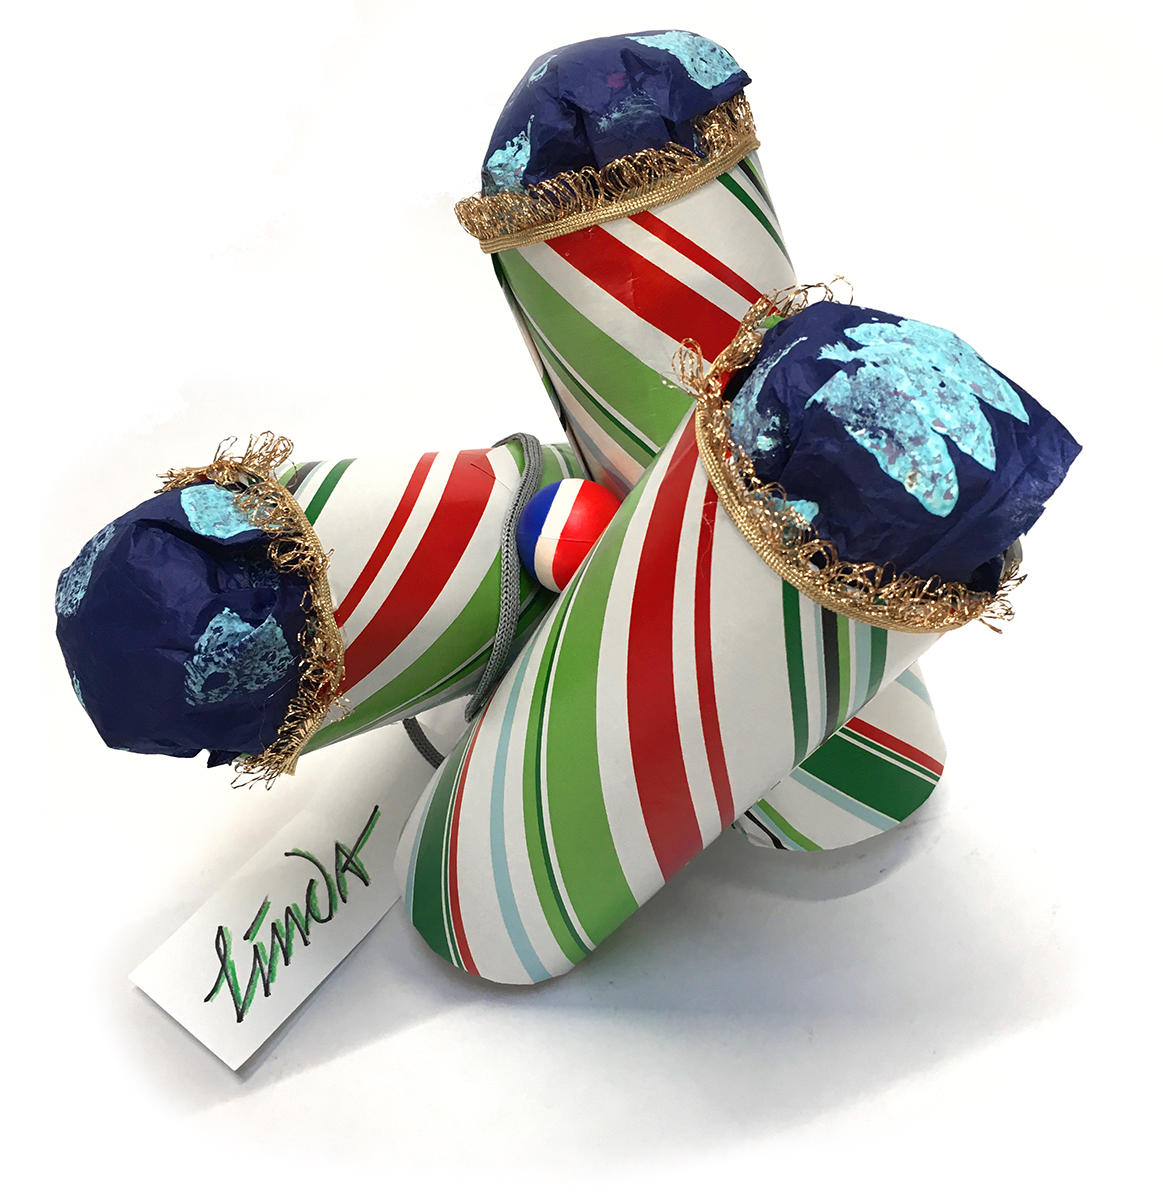
The gift had three parts. In the middle of the night I had the idea of conjoining three boxes. In the light of day it became three tubes. The engineering was challenging. Since the three tubes were to be covered with wrapping paper scraps, I had to figure how to join them without relying on the flimsy wrapping-paper skin as a structural gluing surface. So I drilled holes in the sides of the tubes. I hot-glued six 1″ dowels into the holes. Then I wrapped the three tubes with striped wrapping paper scraps, and then completed the task of gluing three tubes together using their various dowel pegs and holes. It was not easy, and I do not recommend trying this wrapping strategy with angled cylinders. But it did finally come together. I plugged the lower ends with cardboard cross beams and inserted the three gifts into the upper opening of the tubes. I stuffed those upper ends with blue tissue, and added the gold ribbon trim, to give that completing note of wrapping tradition to this non-traditional wrap. When placed amongst wrapped gift boxes it has it own peculiar presence.
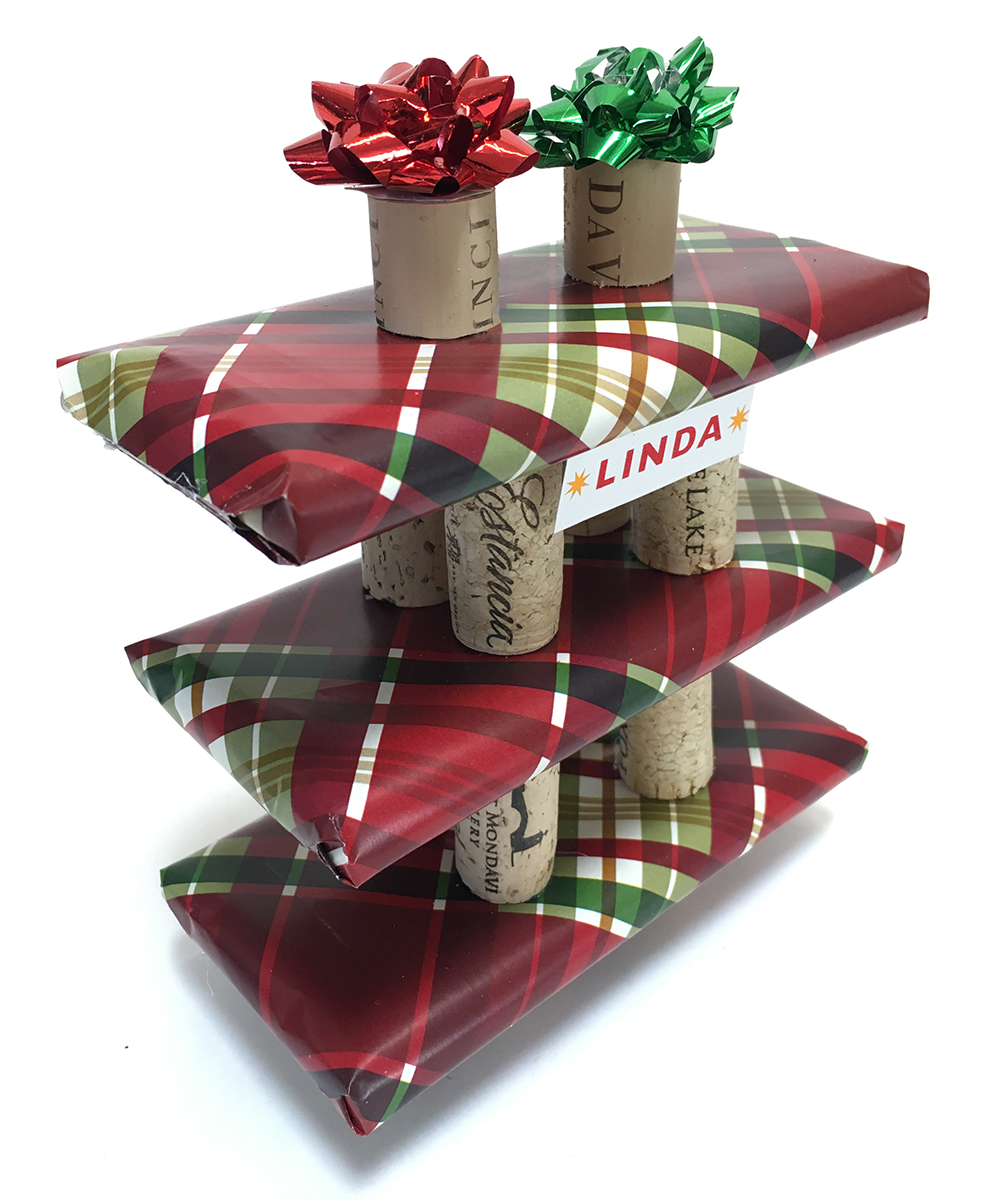
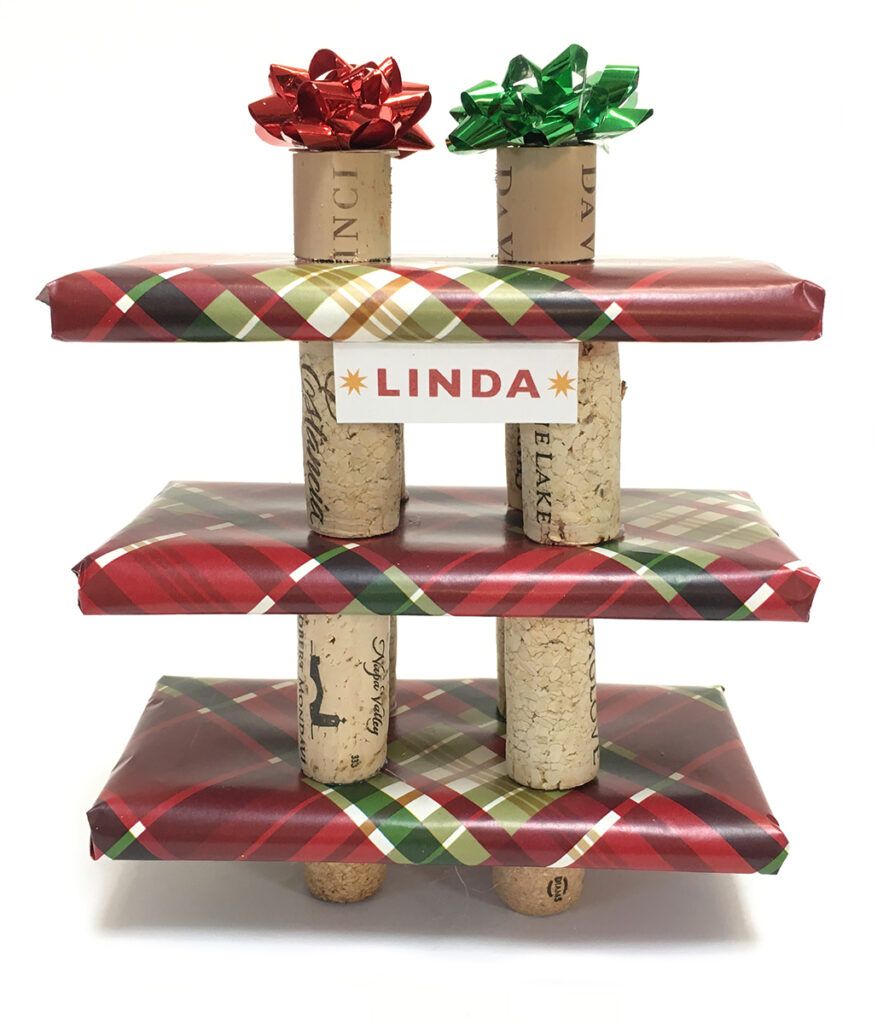
Three identical pieces make up the gift. I wrapped them all the same. Then I placed four corks to space them apart while make it one. There are four half corks under the ground floor. I put two corks on the top with two tiny bows.
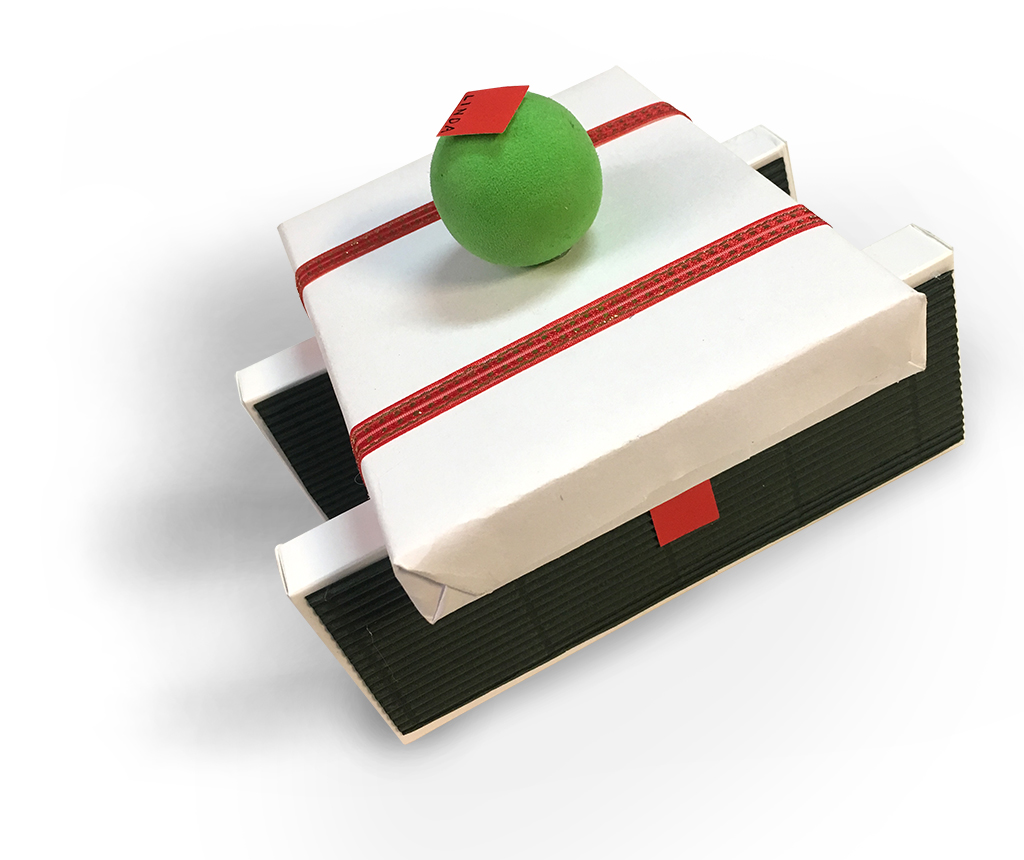
I thought of the form for this one before anything else. I had saved some Apple cable boxes. They are white and have relatively little type on them. I conceived of them as legs. I covered their largest surfaces with interesting paper. What you see here is dark green, finely-corrugated, specialty stock. The back sides are a medium gray cover stock with lots of visible fiber. I put squares of bright red paper in the center of all four large sides. I then wrapped the gift’s box with white paper and began to play with various arrangements, some fully symmetrical, other cantilevered. I chose the stability of symmetry. I added two pieces of red, textured ribbon, applying them on the gift box to be parallel and aligned to the supporting boxes. I then glued them on, adding an invisible cross-beam of the green corrugated paper between the two boxes to provide stability. I felt the whole thing needed the addition of an non-rhomboid form. I found the pale green ball, and glued it on. Last of all I added the recipient’s name on a small red square.
Two contrasting wrap components are at play here. The central area consists of a single slice out of a reject proof from a silk screen poster from 1993 (it was an event about making art out of recycled materials.
But before I wrapped it around the gift’s box I made two bumpers out of bubble wrap and then wrapped the bumpers in blue mylar. These were then taped onto the box. I wrapped the piece of black poster paper around the box and glued it shut. The bumpers are designed to express overflow, making the poster wrap look super snug.
I added two strips of orange ribbon to create a 3rd component, a transition zone between the two primary tactics. The contrast of the poster’s hard-edged constructivist design with the mylar’s wrinkly bulge creates goofy dissonance and thus charm.
I thought I might make a box with unequal sides. And I just happened to have a stack of corrugated board rectangles just large enough to cover the gift.
I cut two sides of one rectangle. Then I proceeded to cut and match three more on their long edges, fixing them progressively with hot glue until I had a four-sided box with open ends.
I stood this construction on end to trace a end panel. Glued it on and did the same on the other end.
Wrapping the pale paper proved to be easier than I imagined it would be. The folding occurred on the small ends.
Then I added two contrasting ribbons, placing them on angles, in sympathy with the capricious shape of the box.