Band Wrap Combines with Two-piece Wrap

jandr


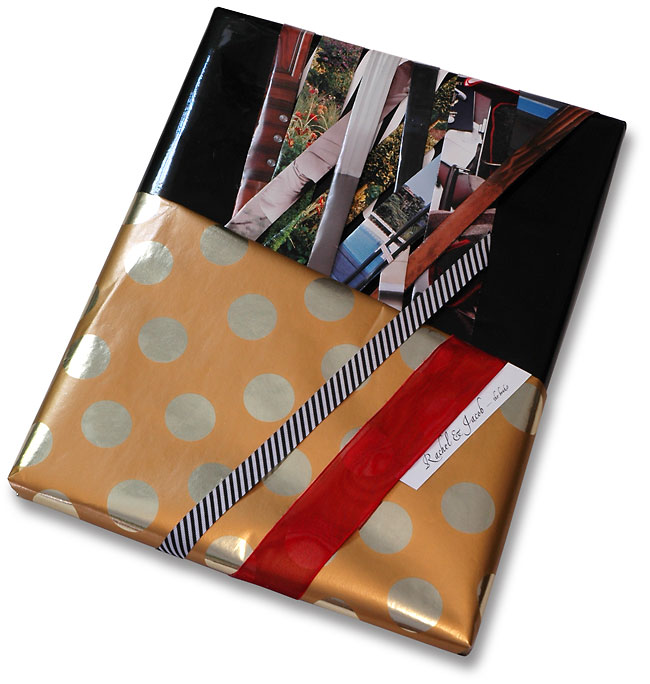
This is the second of Jacob and Rachel’s wraps. I began this wrap as a two-piece wrap. The gold-polka-dot paper had just arrived on a wrapped calendar. But it was to be the second layer of the two-piece technique. I chose the black shiny paper of shopping back as the foundation.

The bag had a white logotype printed on its sides. The vertical lines of its extremely condensed type suggested using the vertical lines of the band wrapping to cover up the logotype; if some of the white lines showed through they would become part of the band design.

First I made a temporary placement of the gold paper so I would know the angle of the edge where two pieces join. Then I wrapped the thick black paper onto the top half of the gift.

The bands went on next, thins strips with soft, puffy folds along their edges.  I left plenty of black paper to the left and right of the bands, which were now looking like a kind of “bow” in the evolving composition. I placed and fixed the gold polka-dot paper. At this point the bands became more of a flower arrangement sitting in the vase of gold paper.

The basic wrap was in place but the wrap was still not complete. I experimented with various kinds of ribbon, placing them in sympathy with the angles of the wrap, but crossing on top of all the wrapping components. As I analyzed the way the dimensional bands tucked into and under the round folded edge of the gold paper, it seemed a good idea to make the ribbon both cross over the two-piece border and also tuck under the bands, ironically enhancing the illusionistic space of this flat design by real dimensional means.

I was getting close to completion. I had wanted some gauze ribbon in the system. I took a red piece and glued it so that it tucked into the  two-piece border, and then ran down parallel to the black-and-white ribbon. I took one of my computer printed labels, cut it into a strip and placed in tuck-under style adjacent to the red gauze ribbon. Now the wrap was finished, a lively constructivist design with a very dimensional feel and plenty of reference to traditional wrapping’s luxury textures.
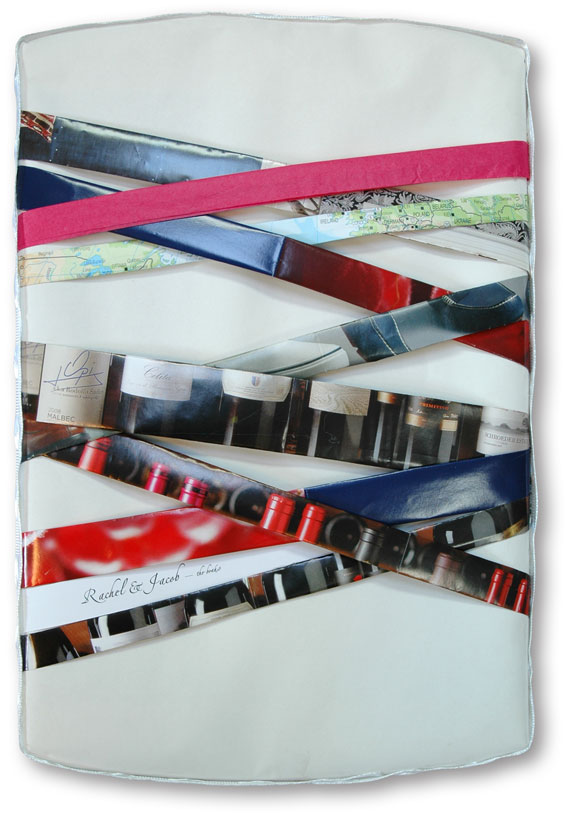
Band Wrap for a Wedding Gift

jandr-b


This is one of two wraps for Rachel and Jacob.  The gift has curved edges on the short ends, and it is solid enough to wrap without a box. I gave it a quick white-paper wrap, and it turned out that the white paper was almost exactly the same width as the long edge. That meant that there was minimal paper overage for making properly folded and taped ends. But typically-folded ends would have been a wrinkly mess on the curves. Freed from that problem by the paper’s width, I was still left me with the challenge of covering the curved ends.

I decided on applying an edge-wrap of ribbon, choosing a shiny, patterned white ribbon for it’s wedding-dress feel. I put the ribbon aside for later application, and moved on to main wrapping tactics.

I disassembled a magazine and some mailers and made a bunch of printed bands, each with two folds, which gives my wrapping bands their slightly pneumatic shape and softened edges. One of the bands is folded tissue.

This gift was large enough that typical pages of magazines are too shorti. I had to use the wide paper of the folded-poster mailers for most of the bands. When those ran out I began to glue regular magazine page bands together, hiding the join by the way I positioned the band under a previously-positioned band.

Laying out the bands is an improvisational exercise. One after another, starting closer to the center, you keep on adding new bands. A bit of weaving is involved. Eventually you begin to see a satisfying arrangement, and that is when you should start to think about stopping.

Once the band wrapping was done it was time to glue the ribbon all the way around the edge, covering up the end wraps.

I printed out a label, and snugged it behind two bands.

Aerosol Lid Wrap

sprayCanLid1

I thought of this one while lying in bed early one morning. I have been saving the plastic lids from shaving cream and deodorant for a while. Some are simple solid colors. Others have a metallic look. They are simple, flexible and tough. I have been using them as feet on boxy packages.

The idea here is speed and elegance. Pop the small gift (in this case a gift card) into the two lids. Join them together with tape. Wrap a piece of ribbon around the join and tape it shut too. Stick on a bow. Write the label on an office dot. You are done.

Of course, you will have given a proper amount of thought to the concept of contrast while knocking out this quick wrap. In this instance the tape contrasts in color and form with the smooth plastic caps; one has color and no pattern; the other has pattern and no color. The ribbon also avoids color and has a fair amount of texture, compared to the lids.

PS: if you run the initial tape join all the way around the two lids,  this wrap is waterproof and will even float, should you go overboard in rough seas.

Soda-bottle Gift Bag

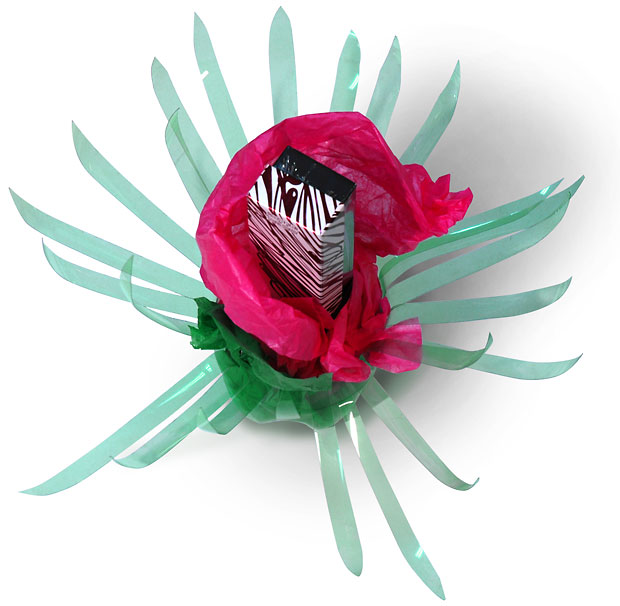
soda-1Today I made a birthday gift wrap for Linda using the poster-child material of the recycling craft world, the polyethylene terephthalate (PET) soft-drink bottle.
I lopped off the top and, using scissors, cut vertical slices down to within 2-3 inches of the bottom of the bottle.

I massaged and rolled the resultant leaves tightly between thumb and finger, pulling the leaf slowly downward, while just avoiding forcing an actual fold into the newly-bent plastic.

I waited until this leaf bending was complete to trim the tips of the leaves into a more appealing shape than that left by the initial slicing.

Now it was time to place the gift. I loosely wrapped the box in tissue, and, since the gift’s box was a handsome piece of box-making, with a sorely-needed contrasting graphic complexity, I chose to leave part of the box exposed. The emerging box’s linear pattern constitutes the stamen of this wrap-art flower.

Wedding Gift Wrap

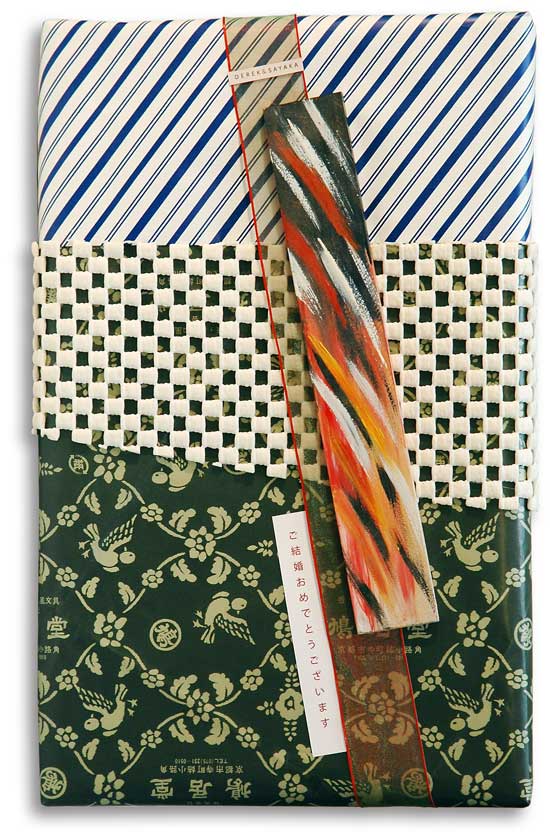
dandsA young friend married a ballet dancer from Japan. To wrap our gift I reached for two scraps of paper that were very different. The light-colored piece with angled stripes is actually the back-side of fancy foil paper. The dark-colored piece is a small Japanese retail bag, cut open and laid flat.
I then reached for something I have been saving for a while, a piece of under-carpet anti-skid foam with a very-dimensional checkerboard pattern of holes. I did not even have to cut it; the shape was already perfect to a) join along the horizontal line where the paper fragments join, and b) bring a new line into my developing system of angles.

I poked around the studio looking for paper scraps and objects to continue my emerging constructivist theme and the steady increase in contrasting textures. Finally I discovered a box of wood fragments on which I had added brush strokes to put excess paint to good use in the daily process of making oil paintings. I selected one and found a good position for it; one of the things the positioning does here is to cover a small rip in the blue-stripe paper.

Before gluing the board in place I rummaged through my ribbon boxes and found a wide gauze ribbon scrap with red edges. I set this along the angled line which the wood bar would later assume, wrapping it around the back, thus making some reference to traditional wrapping customs. The existence of the ribbon also makes the wooden bar assume the role of a bow. I glued the ribbon and the wood bar in place.

Last of all I consulted with my son on the Japanese greeting and we came up with this phrase which I believe says, “congratulations on your honorable wedding.” I printed it on card stock and attached it to the wrap. The final detail was to write the couple’s first names on a little label and apply it to the gauze ribbon.

The variety of patterns and textures, composed in angles over a classic two-piece base wrap demonstrates the pleasing complexity that can develop in wrap-art improvisation.

Madelaine Packing Tray Wrap

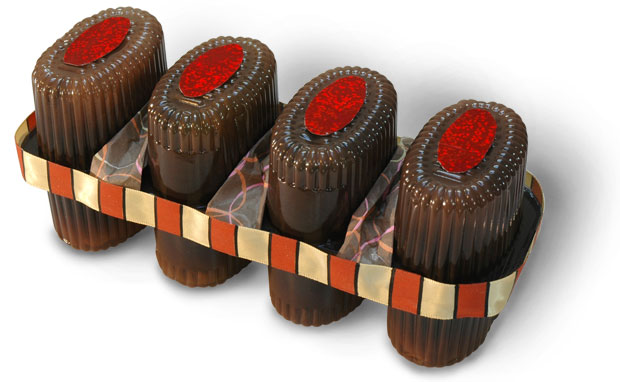
madelaineContinuing my fascination with the transient and expendable plastics of food packaging, I have been saving the flimsy molded materials found inside cookies, and candies. These translucent brown pieces from madelaine packages caught my eye because they look like tall cooking molds.
I took two of them and placed them together, creating four small chambers for four small gifts. Crumpled tissue hides the gifts and is itself partially visible as a texture. A dab of hot glue holds them together. I then made tissue bands and wrapped them around the three spaces dividing the four towers.

I picked some ribbon with a compatible caramel color scheme, and vertical lines to complement the vertical towers of trays.

I cut out some ovals of sparkly red shopping-bag paper and glued them onto the tray-tower tops. They suggest the jellied centers of certain cookies and tarts.

5-pocket Gift Basket

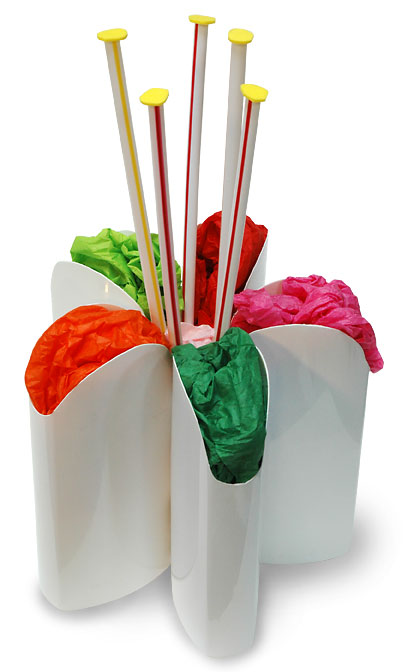
fiverOne day I peeled the labels off a plastic bottle that had held skin cream. I was impressed with the elegant form of this white object. I cut it in half and made a wrap out of it.
I continued to save these specific bottles. This gift-basket wrap is my first attempt at joining a number of them.

I traced a half-circle on the tops of the bottle, cutting the top off with my scroll saw. I had to sand the edges to  remove a burr.

I used a plastic 35mm film can to join the five bottles together. I applied a stripe of hot glue to the side of the film can and joined it to the first bottle. I arranged the five bottles into a pentagonal array, marked the film can, added stripes of glue and, one-at-a-time, joined the five bottles into the basket.

In reference to the floral form, I added five stamen made out of drinking straws with craft foam on the top. Then I stuffed the five pockets and the central well with recycled wrapping tissue.

This wrap accommodates small gifts such as candy, gift cards, pens and pencils, or jewelry.

Take-out Box Samurai

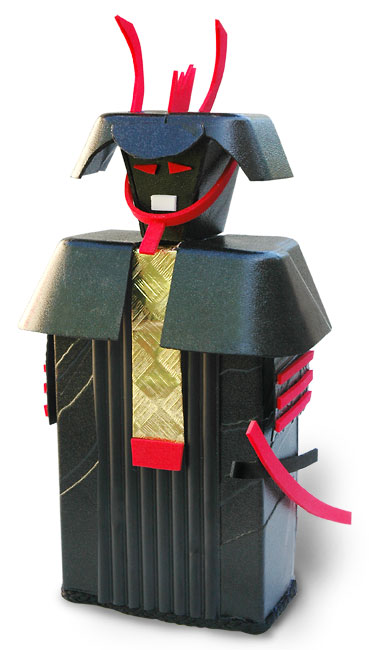
samuraiI’ve been thinking about this one since we brought home some bison ribs from The ( inimitable) Fort restaurant in March. It was a dinner honoring Chips Barry, and presented by Patty Limerick, two of the funniest people in the world. The sharp wit and the excellent meat joined forces in my mind, and when we got home with the night’s extra (not to say spare) ribs in wonderful black foam take-out boxes, I began to see a samurai wrap.
The sides, shoulders and helmet are made from the boxes. The arm protectors, which are visible in this view only because of their three red stripes, are from a coffee-insulator sleeve. The vertical grooved panel is a plastic pencil tray from a Prismacolor boxed set. Black bag-handle string cleans up the lower edge of the package. The gold paper is actual wrapping paper (a scrap). The red and white details are craft foam.

Samurai enthusiasts will, of course, know how far this is from the truth of samurai armor; liberate us from perfection, as Ms. Limerick says. I do plan to make some more samurai wraps at some later date, and will make reference to the many other design details of samurai armor. But this wrap serves the initial vision I had been generating in the weeks since the black-foam take-out boxes passed through our kitchen.

Rock-solid Wrinkle Wrap with Bake-pan Aluminum

bake-pan-167

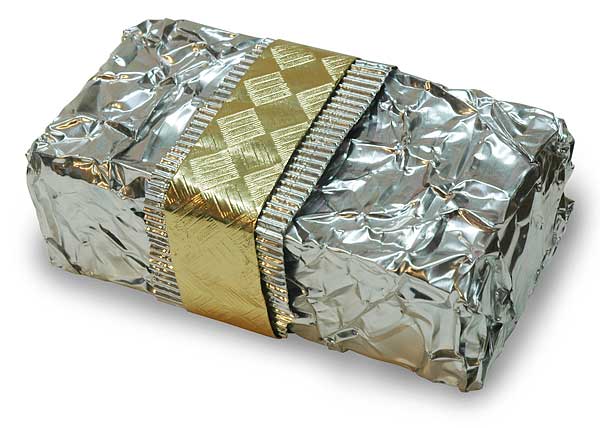
Aluminum is a beautiful material. Yet it is one that passes routinely through our lives, used, ignored, and trashed. When I recently cleaned up an aluminum bake pan that had held a wealth of barbecued buffalo ribs left over from a banquet I organized at The Fort, I tried to roll it out flat, as I have often done with regular aluminum foil. But I could see that I did not have the right tool to flatten this substantial piece of aluminum.

So instead I decided I must embrace the wrinkles. Using my old trasher scissors, I cut a rectangle for wrap. I added a few more wrinkles. Then, with the help of a metal ruler, I wrapped the box in the traditional way, sustaining only two cuts from aluminum’s eager edge. I hot-glued the ends shut.

Experiments brings surprises; the resulting shiny, wrinkled wrap was remarkably dimensionless. Clearly I needed more elements to the wrap. So I cut a strip from the bake pan’s lid and tried out yet another experiment I had been thinking of;  I put the strip through my oil-paint tube-crimper. That made the shiny ribbed band you see wrapped first around the package. It made a good texture, but the color was too similar, so I added the gold-foil paper band to finish off the package.

More experimentation may be required in this realm of trash aluminum, but this is a good start. This wrap has a substantial heft and texture when held; your fingers will say “This is not aluminum foil!”

Cubox Wrap

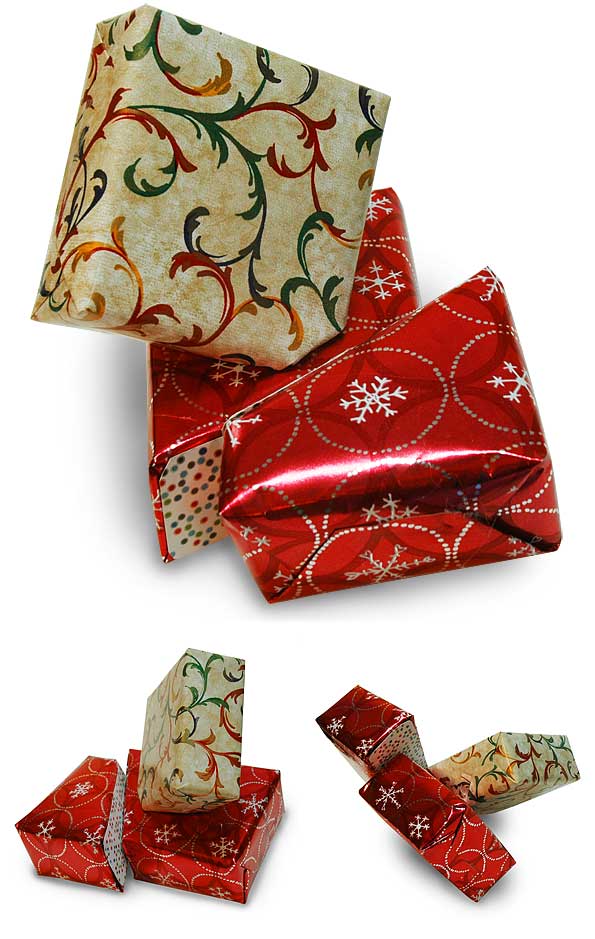
cubox-132bI have been thinking about multi-box wraps since I did the cow wrap at Christmas. In this case I was thinking about literal cubism. I wanted to see sliced and interpenetrating boxes.

An important detail in executing this wrap is to cut the boxes before you put the gift in the box.

I cut the red-wrap box using a scroll-saw. But the little box’s angle made this impossible. Instead, I drew the cut line onto the box and then sliced the line using a box-cutter. I placed the cut ends of the boxes onto a sheet of cardboard and traced the incised opening. I cut those shapes out, and, using hot glue, I attached the three pieces to the three open ends of the two boxes. That would give the boxes the rigidity they need for wrapping.

I chose to wrap them in scraps of traditional wrapping paper in order to use the contrast of tradition and innovation. I’d never tried traditional fold-n-wrap on such odd shaped boxes. Amazingly it is not that hard if you go slow and watch where the paper wants to make folds.

On the red box, I had the idea of gluing on a patch of contrasting paper, in this case the charming patterns from a Clark Richert retrospective invitation. The purpose was to show that this surface was the inside of something that had been sliced.

Next I had to play with the three parts and figure out how best to assemble them. Then I hot-glued them together.