5-pocket Gift Basket

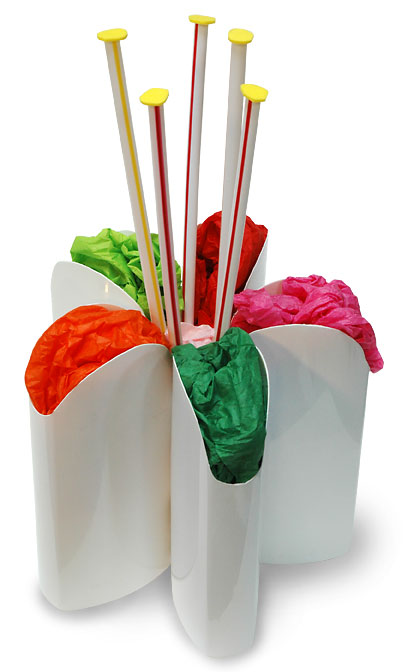
fiverOne day I peeled the labels off a plastic bottle that had held skin cream. I was impressed with the elegant form of this white object. I cut it in half and made a wrap out of it.

I continued to save these specific bottles. This gift-basket wrap is my first attempt at joining a number of them.

I traced a half-circle on the tops of the bottle, cutting the top off with my scroll saw. I had to sand the edges to  remove a burr.

I used a plastic 35mm film can to join the five bottles together. I applied a stripe of hot glue to the side of the film can and joined it to the first bottle. I arranged the five bottles into a pentagonal array, marked the film can, added stripes of glue and, one-at-a-time, joined the five bottles into the basket.

In reference to the floral form, I added five stamen made out of drinking straws with craft foam on the top. Then I stuffed the five pockets and the central well with recycled wrapping tissue.

This wrap accommodates small gifts such as candy, gift cards, pens and pencils, or jewelry.
Take-out Box Samurai

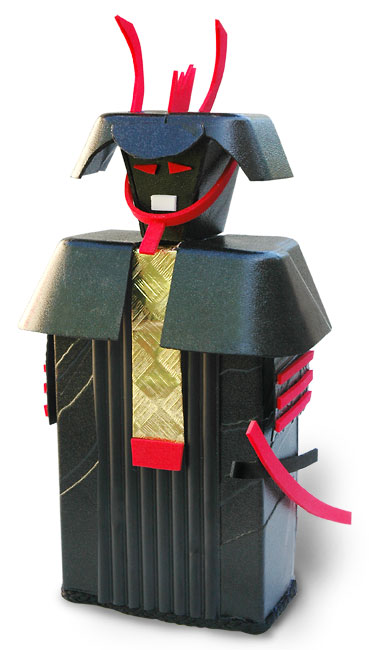
samuraiI’ve been thinking about this one since we brought home some bison ribs from The ( inimitable) Fort restaurant in March. It was a dinner honoring Chips Barry, and presented by Patty Limerick, two of the funniest people in the world. The sharp wit and the excellent meat joined forces in my mind, and when we got home with the night’s extra (not to say spare) ribs in wonderful black foam take-out boxes, I began to see a samurai wrap.
The sides, shoulders and helmet are made from the boxes. The arm protectors, which are visible in this view only because of their three red stripes, are from a coffee-insulator sleeve. The vertical grooved panel is a plastic pencil tray from a Prismacolor boxed set. Black bag-handle string cleans up the lower edge of the package. The gold paper is actual wrapping paper (a scrap). The red and white details are craft foam.

Samurai enthusiasts will, of course, know how far this is from the truth of samurai armor; liberate us from perfection, as Ms. Limerick says. I do plan to make some more samurai wraps at some later date, and will make reference to the many other design details of samurai armor. But this wrap serves the initial vision I had been generating in the weeks since the black-foam take-out boxes passed through our kitchen.

Rock-solid Wrinkle Wrap with Bake-pan Aluminum

bake-pan-167

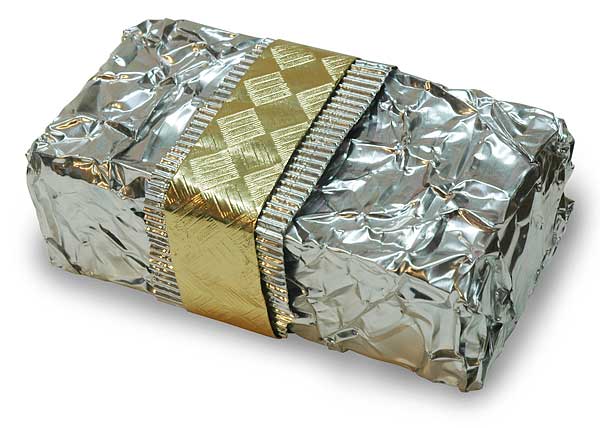
Aluminum is a beautiful material. Yet it is one that passes routinely through our lives, used, ignored, and trashed. When I recently cleaned up an aluminum bake pan that had held a wealth of barbecued buffalo ribs left over from a banquet I organized at The Fort, I tried to roll it out flat, as I have often done with regular aluminum foil. But I could see that I did not have the right tool to flatten this substantial piece of aluminum.

So instead I decided I must embrace the wrinkles. Using my old trasher scissors, I cut a rectangle for wrap. I added a few more wrinkles. Then, with the help of a metal ruler, I wrapped the box in the traditional way, sustaining only two cuts from aluminum’s eager edge. I hot-glued the ends shut.

Experiments brings surprises; the resulting shiny, wrinkled wrap was remarkably dimensionless. Clearly I needed more elements to the wrap. So I cut a strip from the bake pan’s lid and tried out yet another experiment I had been thinking of;  I put the strip through my oil-paint tube-crimper. That made the shiny ribbed band you see wrapped first around the package. It made a good texture, but the color was too similar, so I added the gold-foil paper band to finish off the package.

More experimentation may be required in this realm of trash aluminum, but this is a good start. This wrap has a substantial heft and texture when held; your fingers will say “This is not aluminum foil!”

Cubox Wrap

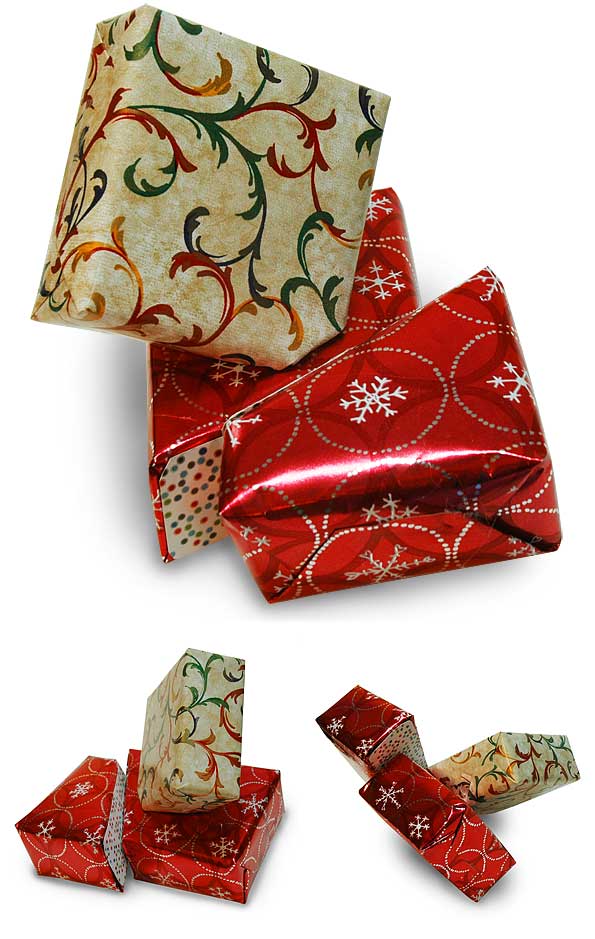
cubox-132bI have been thinking about multi-box wraps since I did the cow wrap at Christmas. In this case I was thinking about literal cubism. I wanted to see sliced and interpenetrating boxes.
An important detail in executing this wrap is to cut the boxes before you put the gift in the box.

I cut the red-wrap box using a scroll-saw. But the little box’s angle made this impossible. Instead, I drew the cut line onto the box and then sliced the line using a box-cutter. I placed the cut ends of the boxes onto a sheet of cardboard and traced the incised opening. I cut those shapes out, and, using hot glue, I attached the three pieces to the three open ends of the two boxes. That would give the boxes the rigidity they need for wrapping.

I chose to wrap them in scraps of traditional wrapping paper in order to use the contrast of tradition and innovation. I’d never tried traditional fold-n-wrap on such odd shaped boxes. Amazingly it is not that hard if you go slow and watch where the paper wants to make folds.

On the red box, I had the idea of gluing on a patch of contrasting paper, in this case the charming patterns from a Clark Richert retrospective invitation. The purpose was to show that this surface was the inside of something that had been sliced.

Next I had to play with the three parts and figure out how best to assemble them. Then I hot-glued them together.

Doric Cork-and-Cap Temple Wrap

Cork and Cap Temple

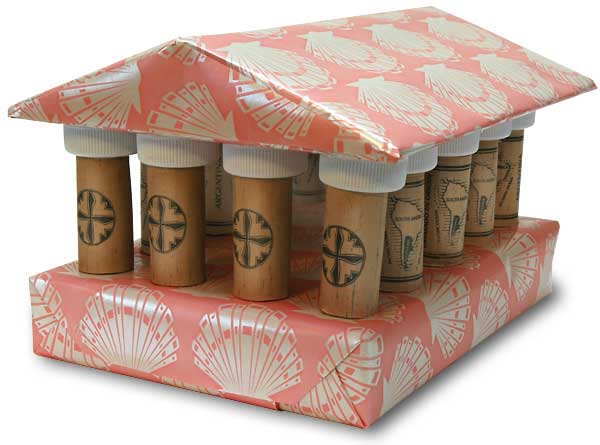
One night while I was washing the dishes (and recycling plastics), my mind was wandering.  I suddenly saw columns made with corks, and capitals on those columns made with milk-carton-caps.

This wrap is what I saw: a Doric temple in recycled materials. I wrapped a flat box using some used wrapping paper, pink with shells. I glued the corks onto the wrap. I glued the white milk-carton tops onto the corks.

Next, I had to construct the triangular roof. I cut pieces of plain cardboard, gluing the triangular pediments on the end of the roof and a base underneath. I wrapped this roof and glued it onto the columns.

Magazine-page Woven Band-wrap

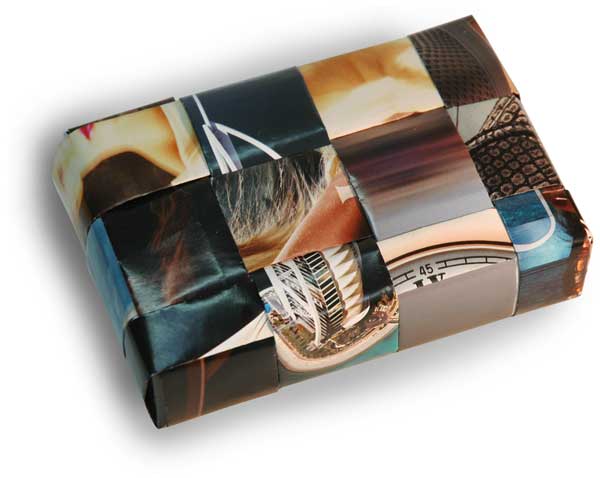
band-weave-104Wrapping with bands is a great way to take advantage of our print-rich environment. I take magazine pages and cut them into long  strips, 2″-5″ wide. Fold the two long edges over. This gives both the edges and the whole band a softened and rounded look, a pillow effect.
I glue or tape the bands on the backside and wrap them around. In this case I also chose to weave them. The procedure consists of gluing bands along one short and one long edge of the box. The weave begins at the only corner where these glued bands meet. Alternating between short side and long side, you wrap the bands around and affix them to the back, weaving the bands as you go.

For as tutorial on making the bands, go to this page in the Wrap Art Gallery.

Meat-Tray Fins on Red Bag Wrap

black-fin

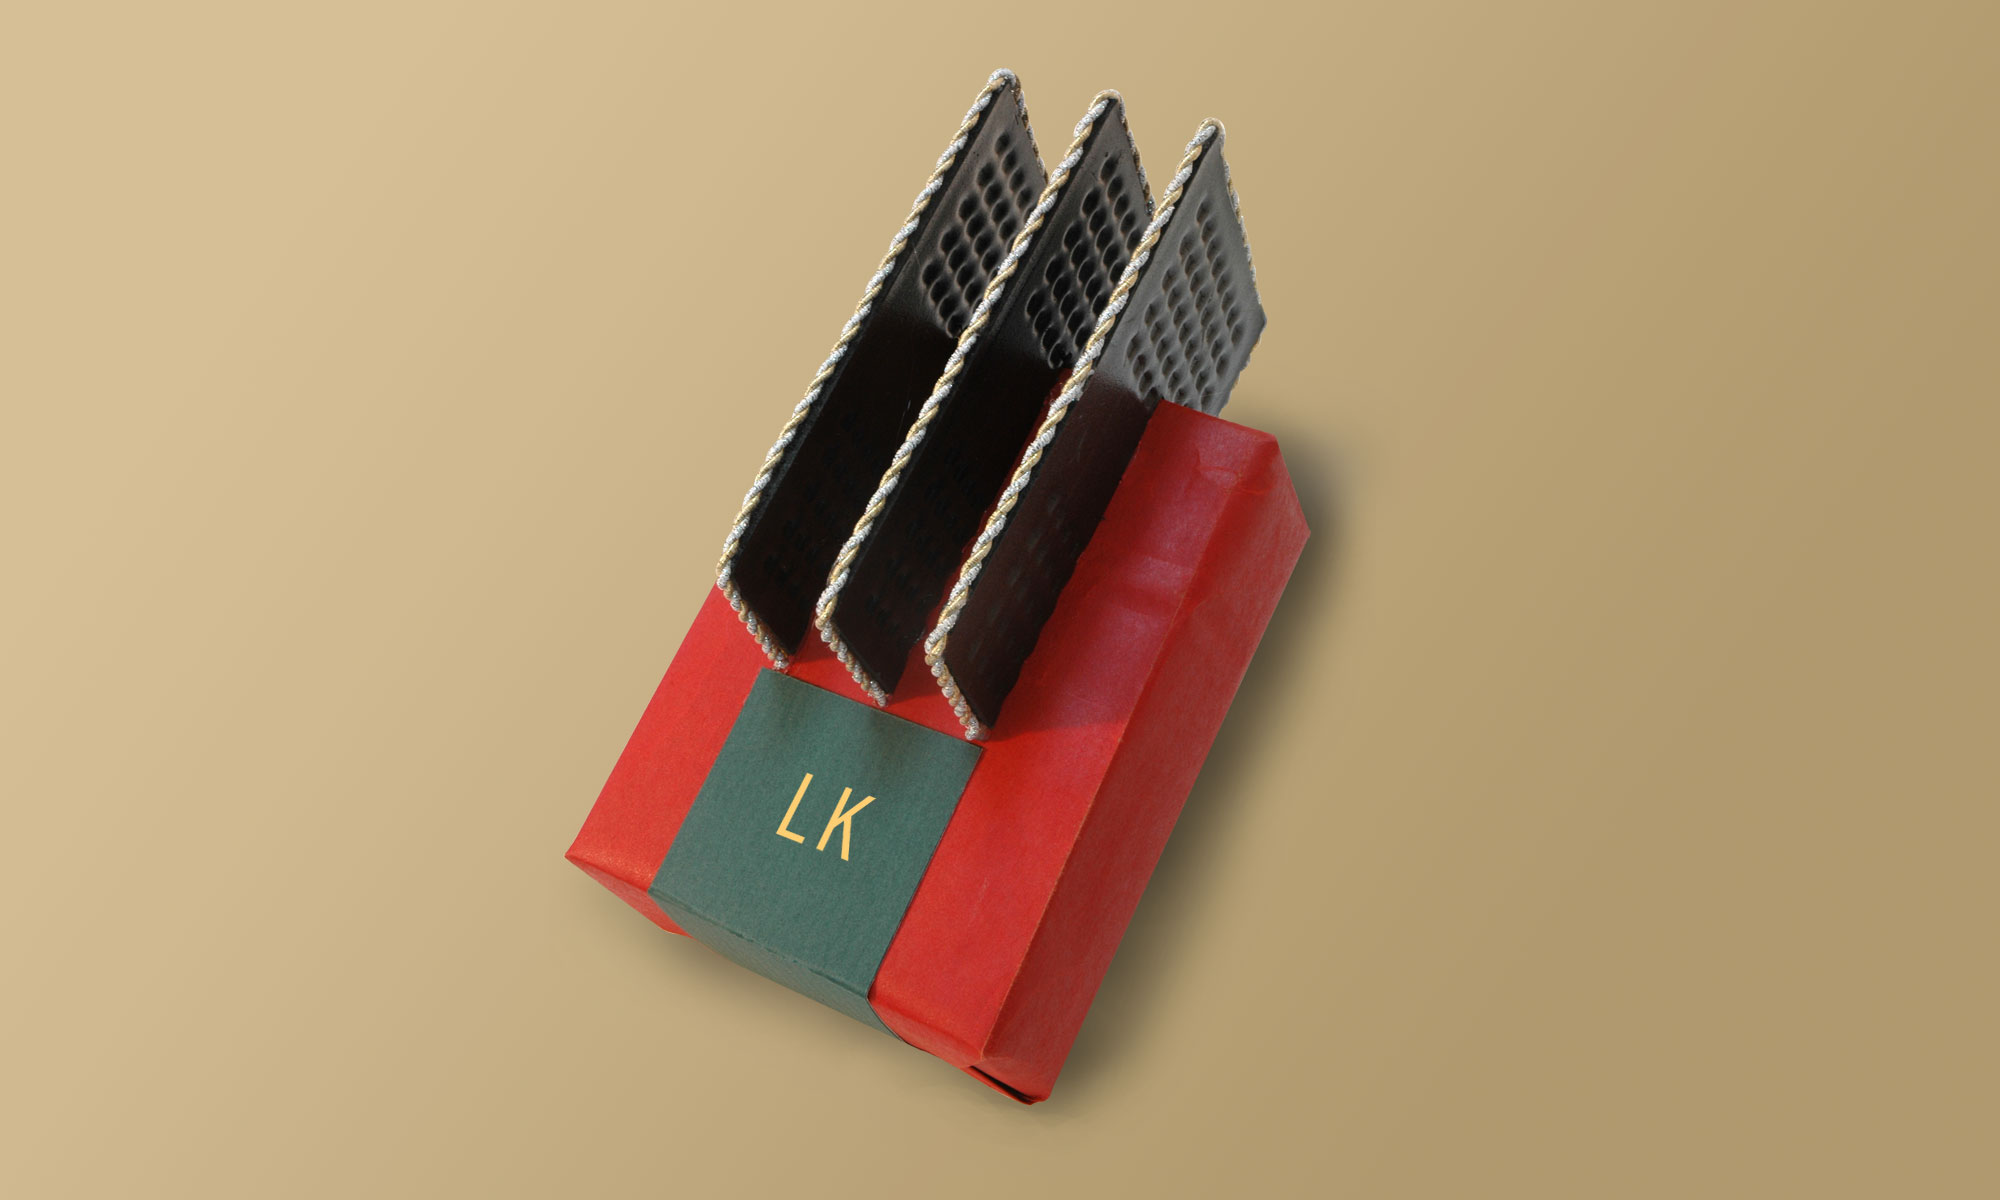
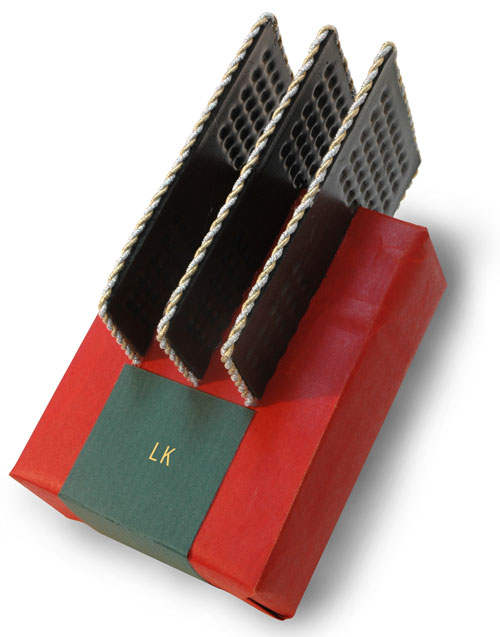
I confess to a fondness for the plastics that pass through our kitchen. The foam used to package things from the meat counter are light, shiny and easy to cut. After making some stews with our new crock pot I sidetracked some trays into my wrap bin. As I continued washing the dishes I could begin to see fins emerging from a wrap.

I wrapped the present in red paper from a shopping bag. I cut and glued the fins. I put little dabs of hot glue on the fins and attached some recycled gold-foil-and-white wrapping cord to add an element of sparkle from the traditional wrap aesthetic. Last of all, I cut, fitted and glued the dark green rectangle to complete the wrap and make a frame for recipient’s initials.

I have been enjoying taking a more sculptural approach to wrapping. It opens the door for new uses of throw-away materials. And it is lots of fun.

Recycled-bottle Lilly Wrap

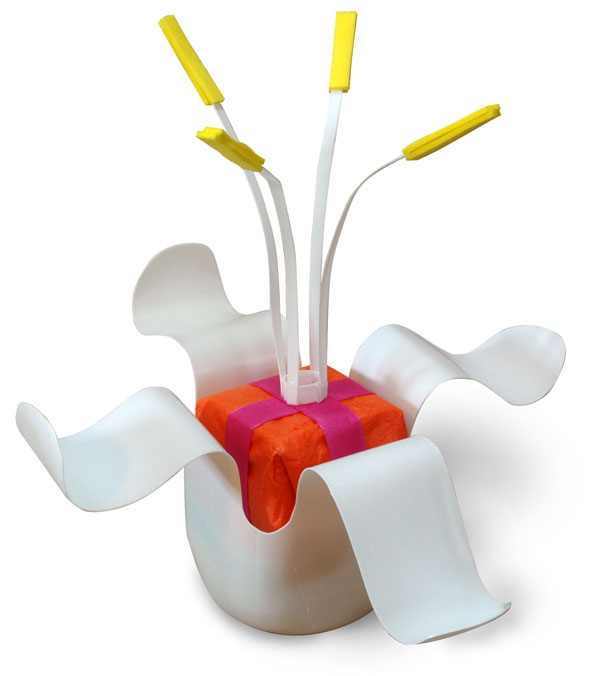
lilly-39I took a kefir bottle and cut off the printed wrap. Underneath it was a pure white bottle. I cut off the top area and then took scissors and cut down along the corners and back up again, four times. This made the four petals. I trimmed their tops to round them out. Working the petals with my fingers I was able to give them soft curves.
I wrapped the gift in orange tissue and placed it inside the lilly. Then I took the scraps cut from the four corners, and made the pistil stems. I made a small ring to glue them to and added yellow foam to the ends. It was necessary to add some ribbon around the gift in order to make the pistils’ ring stable on top of the gift. A few pieces of scrap foam made the orange gift more secure in its white lilly holder.

Tube Wrap Recycling

tube-227

When you have a tube to wrap, you are given an excellent opportunity to use up the small scraps of wrapping paper you have saved. Not only do you get the benefits of this recycling, you also get a speedy wrap. Start anywhere. Add contrasting pieces of paper; fold the edges and let those edges overlap the previous piece. Add ribbons, too. I added a circle of paper over the many folds that close the top. A bow on the top finishes the top.

Bottle-cap Star

botcap-star-186

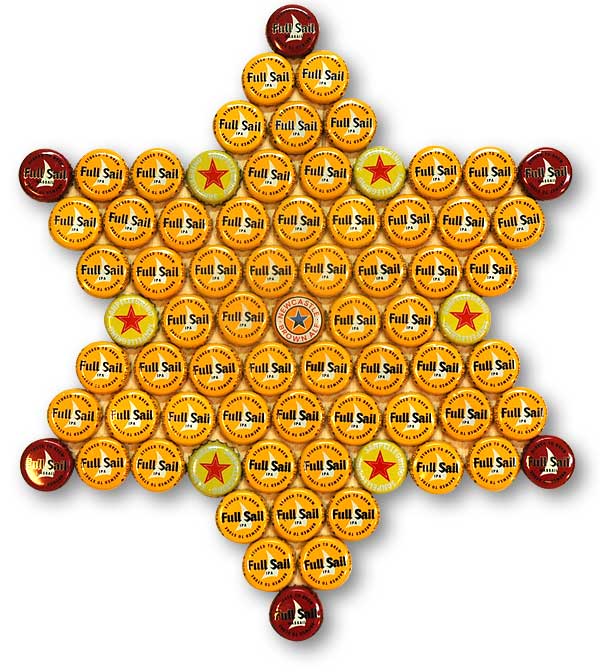
I made this star as a gift for my brother Michael. I save my bottle caps grouped by kind in separate containers. This allows me to design  with them easily. Bottle caps are circles; thus they tile on a hex grid. I make a paper drawing first, using a 30-60-90 triangle to create the hexagonal forms.

I have made bottle-cap medallions that I applied to the kitchen cabinets of our cabin. Click here to take a peek at them.