As a member of the Colorado Yale Association Service Group I went to a wrapping session at Florence Crittenton High School. The school serves young single mom’s. In a unique collaboration with Denver Public Schools, Crittenton Services helps teen mothers stay in school and graduate, give birth to healthy babies, learn how to be nurturing mothers, pursue post-secondary education and acquire marketable job skills.
We were wrapping batches of five gifts targeted for a given student and her child: clothes, diapers, toys and supplies.
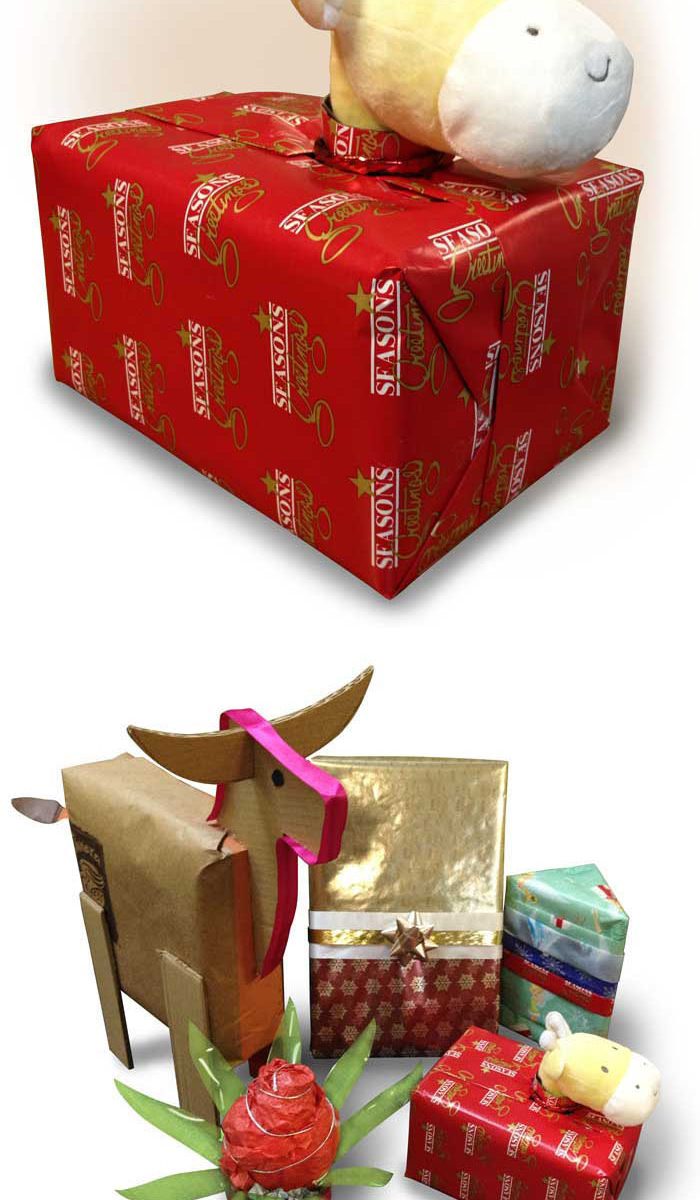
The stuffed animals were not in boxes. A volunteer offered me a tattered old box. It was small. Though I could have squeezed this giraffe (with inner music box) into the box, my own child mind balked at the brutality of such stuffing. So I cut half-moon holes into the flaps of the box and enclosed the giraffe with the head happily emerging.
I then wrapped the box in a simple suit of red holiday paper, using a central folded-edge band to cover the join. I also made a collar to help the giraffe keep its chin up, to enhance it’s sculptural spirit.
I have played with exposing the gift in some semi-transparent wraps, but this is the first time I have let the gift out of the bag. It felt like a breakthrough wrap, a revelation to me and to the eventual recipient.
Plus the giraffe was clearly so eager to meet its new child, an idea perfectly in keeping with the spirit of Christmas.
I have included a detail image of the giraffe’s whole group of five wraps: a cow wrap, a two-piece wrap in foil with ribbon, an improvised triangle box with a simple band wrap, the giraffe, and soda-bottle pineapple wrap.