Silver Sun Screen Wrap

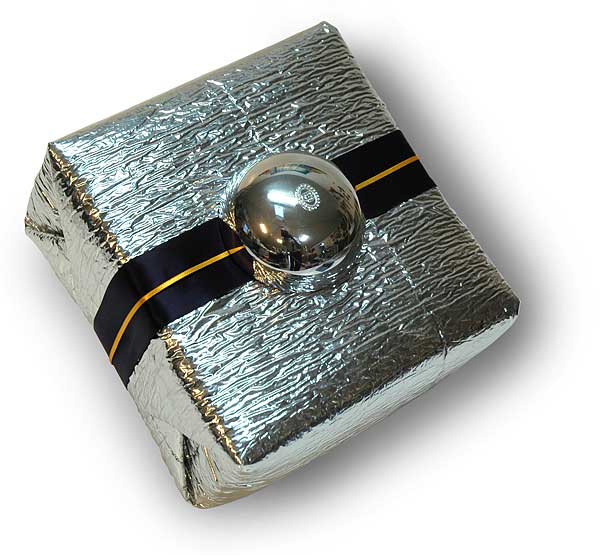
I was headed out to the dumpster to throw out the trash before beginning my early-morning work session. As I put a worn automobile-windshield sunscreen into the dumpster, I felt that twinge of wrapper’s inspiration that keeps so many things from entering the trash stream.

Back in the studio I knocked out this prototype wrap. A deep blue ribbon covered up a big crease in the silver mylar. A thin yellow ribbon provided the necessary graphic complexity. And last of all I took a silver plastic cosmetic-product cap that was sitting on my drawing table. I had saved it for months and had even tested it on numerous wraps. It had never made the cut until today.

The sunscreen is lined with foam beneath its silver mylar. That gives the finished package a very comfortable “hand.”

Round Wrap in Pie-bin Bottoms


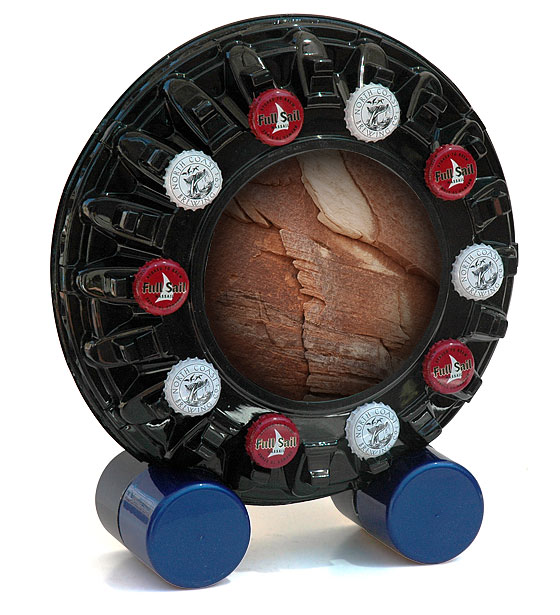
Pies from our Whole Foods come in marvelous molded-plastic containers. Put the bottom halves from two of them together and you have a strange round device that resembles some kind of off-road tire, or perhaps the base form of a dark space ship.

Those two pieces of black plastic are glued together using 1-inch-long pieces of popsickle sticks. They are hot-glued into little slots conveniently located around the molded shape of the pie-bin bottoms

I next made the feet for this wrap using four lids from aerosol deodorants. Their plastic is metallic adding more machine aesthetic to this peculiar wrap.

I glued a sequence of bottle caps on ten of the twenty raised knobs that ring the pie bottoms’ flat central circle, adding to the visual theme of circles. Their detailed design and printing enriches the design by bringing a finer level of detail to the complex but larger forms of the black plastic.

It actually took a while to figure out what to put in that central, flat circular space. I cut out various magazine-ad photographs and also fragments of wrapping paper and art paper. Nothing seemed to be compelling. I finally decided to use my own photography. I made a circular crop of a photo I took last week while hiking in the Comb Ridge of southern Utah. I added a black “inner glow” in Photoshop. I printed it, cut it out and glued it into the circular recess.

In order to spare the recipient the potential anxiety of having to destroy such a curious sculpture, I cut out the circular recess on the back side and made it into an access door closed with simple tape fixtures.

Numinous Trashformation

An amazing quantity of exotic materials flows through our households every day.

As a part of 1) my quest to divert some of the more charming of these objects away from the dumpster and 2) my need to reduce the volume of my in-studio recycling bins, I made this wrap.

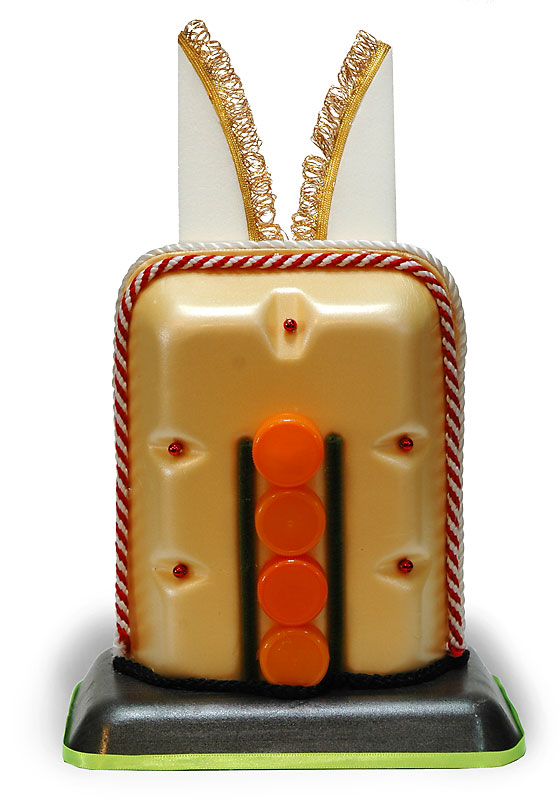
I started with a long yellow foam tray that once held chicken breasts. I cut it in half and glued the two halves together. That leaves an almost-closed box; only the bottom is open.

Resolving to solve that later, I began to trim out the yellow box. The edge where the halves join I covered with a white cord taken from a shopping bag. I then glued dark-green chenille stems into vertical depressions in the foam tray. I glued orange-juice caps in a column between the stems. I clipped small shiny red beads from a scrap of bead-cord and glued them into the eye-shaped molded depressions in the foam tray.

After a bit of testing, I chose another foam tray for the base. I trimmed off the lip that runs around its edge and glued on a scrap of lime-colored ribbon. Then I placed the gift inside the yellow shell. I made a door in the base foam, so the gift could be removed without destroying the wrap; I taped the door shut. I glued the two foam objects together.

I was not yet ready to stop. The wrap seemed to want more. I glued a piece of black bag-handle  cord to the join between black and yellow foam. Adding these extra components have a powerful effect. The identity of the foam as food-packaging trash begins to recede, and the underlying power of the foam’s native form and its beautiful qualities asserts itself.

Thus inspired I took a single scrap of thick white foam from my tiny-foam-scraps bag. I cut it in half and had two Cycladic ears (c.f. church architecture of Santorini), which I glued to the top of the wrap. Picking up conceptual momentum, I added the red/white bag-handle cord. And I added the gold fringe ribbon to the ears.

I stood back and contemplated the wrap. It had a new and mysterious appeal, all its own, of numinous packaging.
Red-Rocker Wrap

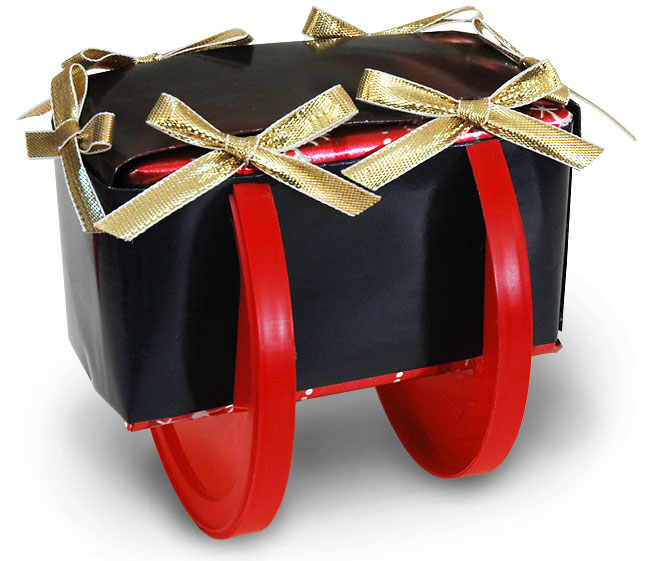
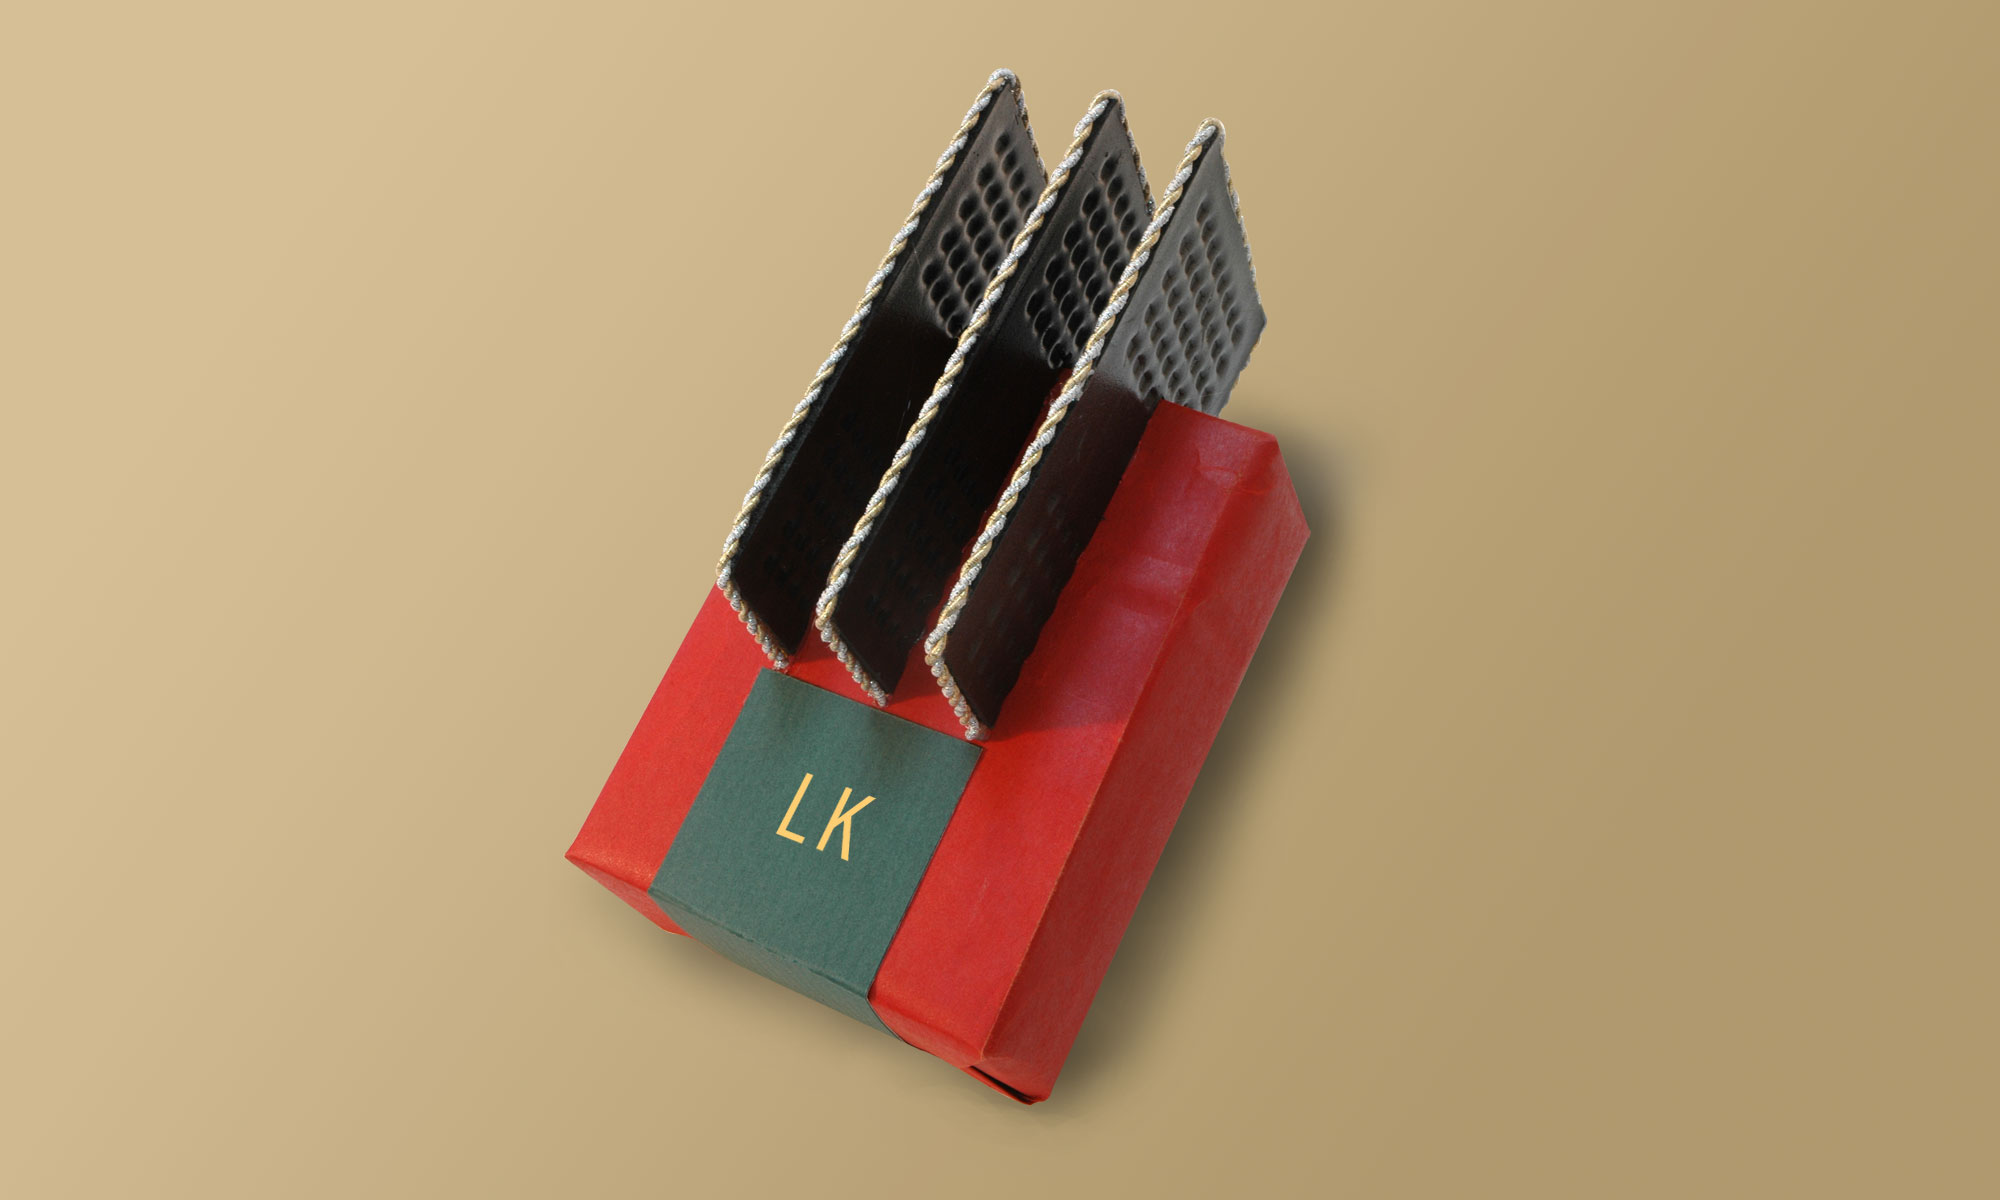
I have put legs on my packages before. But I had not tried rockers. These red ones are saved from those cylindrical boxes that some raisins use. They are small and thus require a very small package. And the package itself requires that some weight be added inside to the bottom of the package, so that the wrap actually rocks instead of just falling over. The rectangular cut out area in the lids must extend below the center of the circles.

The wrap on the little box started out with some red-foil holiday paper. But there was not enough contrast with the lids. I folded two magazine-page bands and wrapped them around the original wrap, leaving some of the foil paper peeking out. I hot-glued the red lids onto the bottom and sides of the wrap.

When I was done with that, I felt that the spots where the circle reached the top of the wrap needed punctuation, so I then glued on small gold bows. Last of all I added gold bows to the ends of the wrap.

I plan to find two matching lids with a larger radius and carry on my experiments in rocker wrapping.

Car Wrap

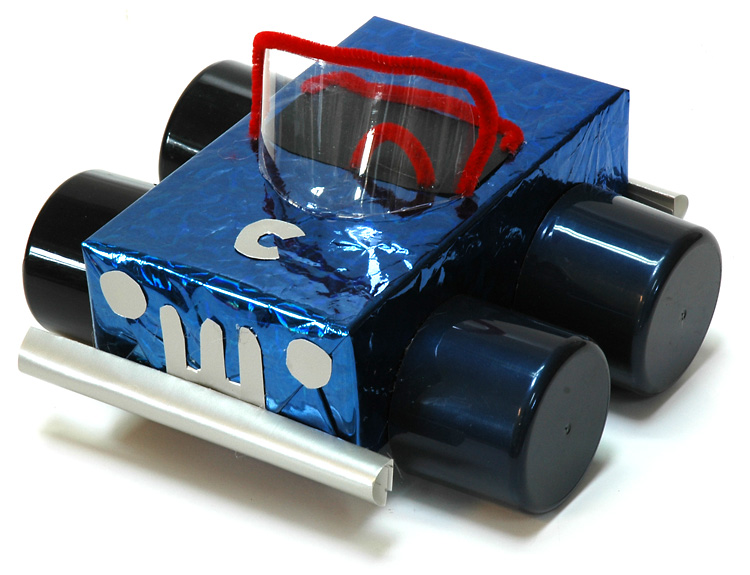
Toys are ubiquitous at Christmas. Why not a wrap that aspires to be a toy? Such are the thoughts a wrap artist may be driven to entertain on the 23rd of December.

I used a shiny blue mylar with built-in swirly pattern. The wheels are aerosol-can lids. I used pieces of corrugated box to make special gluing hardware whose job it was to make the lids attach to the thin and flexible mylar.

The windshield is made of soda-bottle scrap. Red chenille wires outline the windshield and passenger compartment, and make the steering wheel.

The bumpers, grill and headlights are made of fragments of a silvery shopping-bag paper.

The “C” on the hood is the present’s label.

Sliced-Box Tree with Wine-Bottle Bumper

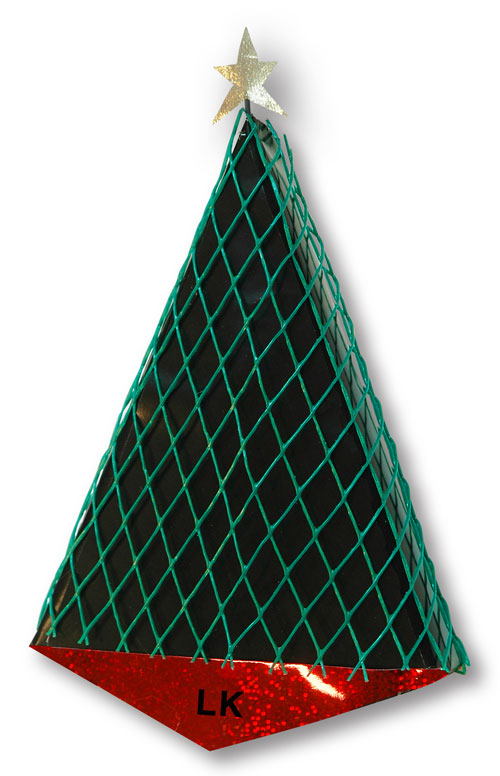
In keeping with my fascination for cubist ideas, I took a small flat box of long proportion and drew a line from one corner to its opposite corner. I then placed the box on the table of my scroll saw and cut the box in half. By rotating one of the halves and joining it to the other with two pieces of tape, applied to the pointiest ends, I had a box shaped like a christmas tree.

I wrapped the box with paper from a large marketing flyer that had lots of solid black areas. This kind of coated paper makes easy folds and creases. With care I slowly folded with gentle finger work and trimmed with occasional scissorwork. I taped the folds and had a nicely wrapped black tree.

Next I took one of those green-plastic web sleeves that they put on one’s wine bottles to keep them from hurting each other, and trimmed it to wrap around the box. Its dimensional grid added symbolic pine branches, and, coincidentally, matched the angles of my sliced box.

Since the plastic was not large enough to cover the whole wrap, I was left with a triangle of space at the bottom. I added a patch of red metallic shopping-bag paper.

I thought the tree needed a star. I cut it from gold ribbon and mounted it on a small piece of twist-tie using hot glue.

And I finished the wrap with initials made with my ancient supply of rub-off type.

Transparency in Wrapping

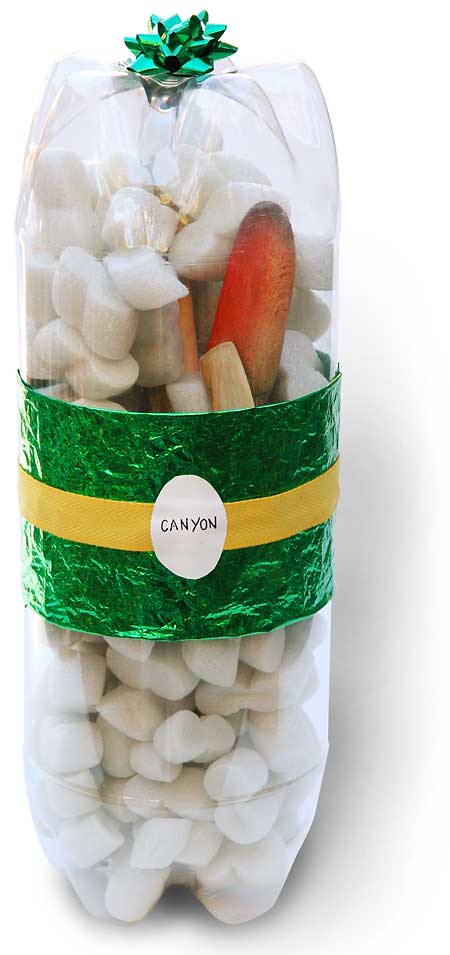
soda-reveal-2Today’s wrap embraces the 21st century’s mandate for greater transparency in all things. I was giving a small sculpture commemorating son Canyon’s 20th birthday, and I had the idea of using the same two-cylinder recycle-wrap design that I had used two weeks ago with shaving can lids. This time I would use PET soda bottles.
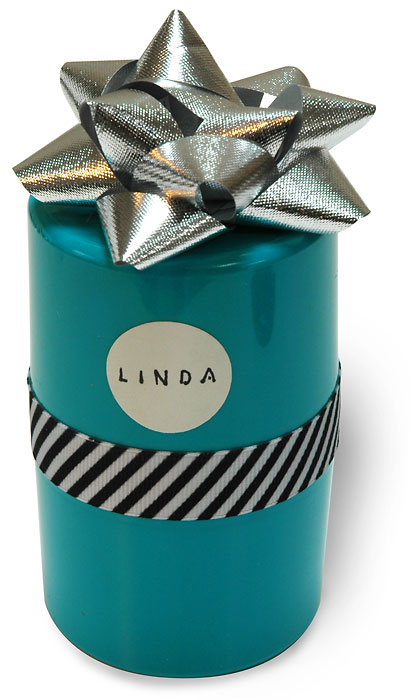
I picked two clear ones and cut them six inches above their baseline. I had imagined simply inserting the gift, taping it shut and adding some kind of opaque band around the wrap. But some typical material-plane challenges reared up immediately. It is important to have the two halves aligned with parallel sides. This is hard to do unless you have made the cuts perfectly. I had not, so I used a technique honed while cutting (the) mustard bottles in half to get the last dollops: after the big circum-navigatory incision, I make a small one ninety degrees to it. This allows one to pinch one half of the bottle slightly and push it into the other half. I did this with my soda bottles. They snugged together. They could be taped into one.

But first I put some foam packing peanuts into one half, adding in the gift (a small driftwood and aspen-fragment sculpture of a “20” with red-trimmed crossbar) and then adding more peanuts. It is a little tricky getting the right amount of the foam objects, but at a certain point you can achieve a balance between mobility of the foam & gift and semi-visibility of that gift. I used small pieces of tape to hold the two halves together while adjusting the gift/foam mix. Then I put one large piece all around to seal up the wrap.

At this point began a typical process of trial, error and learn to determine what constituted a good belt of wrapping around this odd object. I tried lots of papers. Patterns lost out to solids, and flat solids lost out to this very wrinkly piece of green mylar, the color a contrast to the red driftwood crossbar that was peeking out through the foam peanuts. I added a simple yellow cotton ribbon and then an oval of adhesive plastic with the recipient’s name written on with a fine marker.

The wrap was definitely a bit goofy looking. So I added a tiny bow on the top, a wrap equivalent to a clown’s over-sized shoes and under-sized hat. I feel I have achieved some significant innovations in this wrap. 1) I have moved the lowly packing-peanut from its usual role of mess-after-the-fact to a new prominence as the equivalent of stage-smoke, both hiding and revealing the lead actor, the gift. 2) I have also found a way to make transparency a viable tactic for the wrap artist; you can see the gift before unwrapping but without abandoning the mystery of what that gift might be.

If you want to see what the sculpture looked like, click here.

Aerosol Lid Wrap

sprayCanLid1

I thought of this one while lying in bed early one morning. I have been saving the plastic lids from shaving cream and deodorant for a while. Some are simple solid colors. Others have a metallic look. They are simple, flexible and tough. I have been using them as feet on boxy packages.

The idea here is speed and elegance. Pop the small gift (in this case a gift card) into the two lids. Join them together with tape. Wrap a piece of ribbon around the join and tape it shut too. Stick on a bow. Write the label on an office dot. You are done.

Of course, you will have given a proper amount of thought to the concept of contrast while knocking out this quick wrap. In this instance the tape contrasts in color and form with the smooth plastic caps; one has color and no pattern; the other has pattern and no color. The ribbon also avoids color and has a fair amount of texture, compared to the lids.

PS: if you run the initial tape join all the way around the two lids,  this wrap is waterproof and will even float, should you go overboard in rough seas.

Soda-bottle Gift Bag

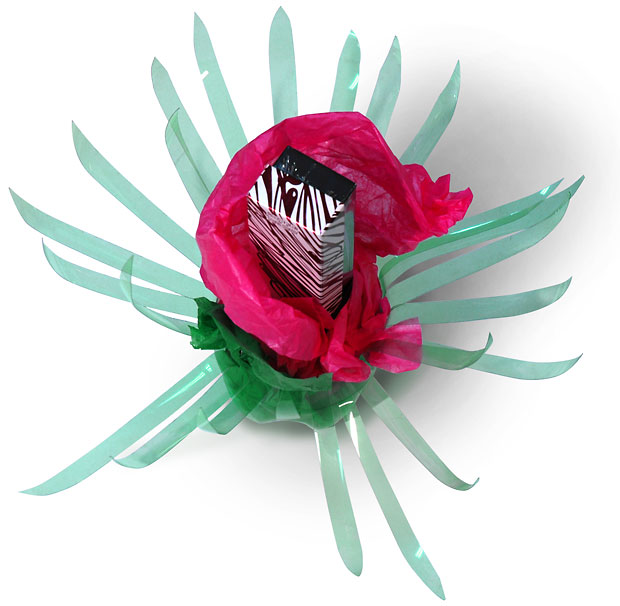
soda-1Today I made a birthday gift wrap for Linda using the poster-child material of the recycling craft world, the polyethylene terephthalate (PET) soft-drink bottle.
I lopped off the top and, using scissors, cut vertical slices down to within 2-3 inches of the bottom of the bottle.

I massaged and rolled the resultant leaves tightly between thumb and finger, pulling the leaf slowly downward, while just avoiding forcing an actual fold into the newly-bent plastic.

I waited until this leaf bending was complete to trim the tips of the leaves into a more appealing shape than that left by the initial slicing.

Now it was time to place the gift. I loosely wrapped the box in tissue, and, since the gift’s box was a handsome piece of box-making, with a sorely-needed contrasting graphic complexity, I chose to leave part of the box exposed. The emerging box’s linear pattern constitutes the stamen of this wrap-art flower.

Madelaine Packing Tray Wrap

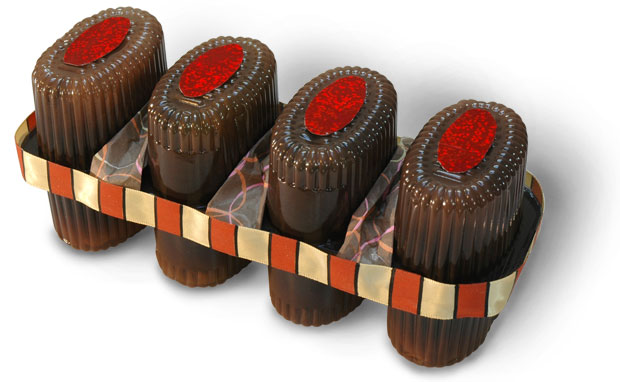
madelaineContinuing my fascination with the transient and expendable plastics of food packaging, I have been saving the flimsy molded materials found inside cookies, and candies. These translucent brown pieces from madelaine packages caught my eye because they look like tall cooking molds.

I took two of them and placed them together, creating four small chambers for four small gifts. Crumpled tissue hides the gifts and is itself partially visible as a texture. A dab of hot glue holds them together. I then made tissue bands and wrapped them around the three spaces dividing the four towers.

I picked some ribbon with a compatible caramel color scheme, and vertical lines to complement the vertical towers of trays.

I cut out some ovals of sparkly red shopping-bag paper and glued them onto the tray-tower tops. They suggest the jellied centers of certain cookies and tarts.